
Campaigns
The Campaigns Module is your command center for broadcasting targeted messages, automating outreach, and tracking engagement. By utilizing powerful segments and dynamic variables, you can send personalized WhatsApp campaigns at scale.
Managing Campaigns
The campaign management interface allows you to view, create, schedule, and track all your marketing broadcasts from one centralized dashboard.
How to Access the Campaigns Module
Before you can send your broadcasts, you need to navigate to the Campaigns dashboard.
Step 1: Log in
Log in to your account to view your main dashboard.
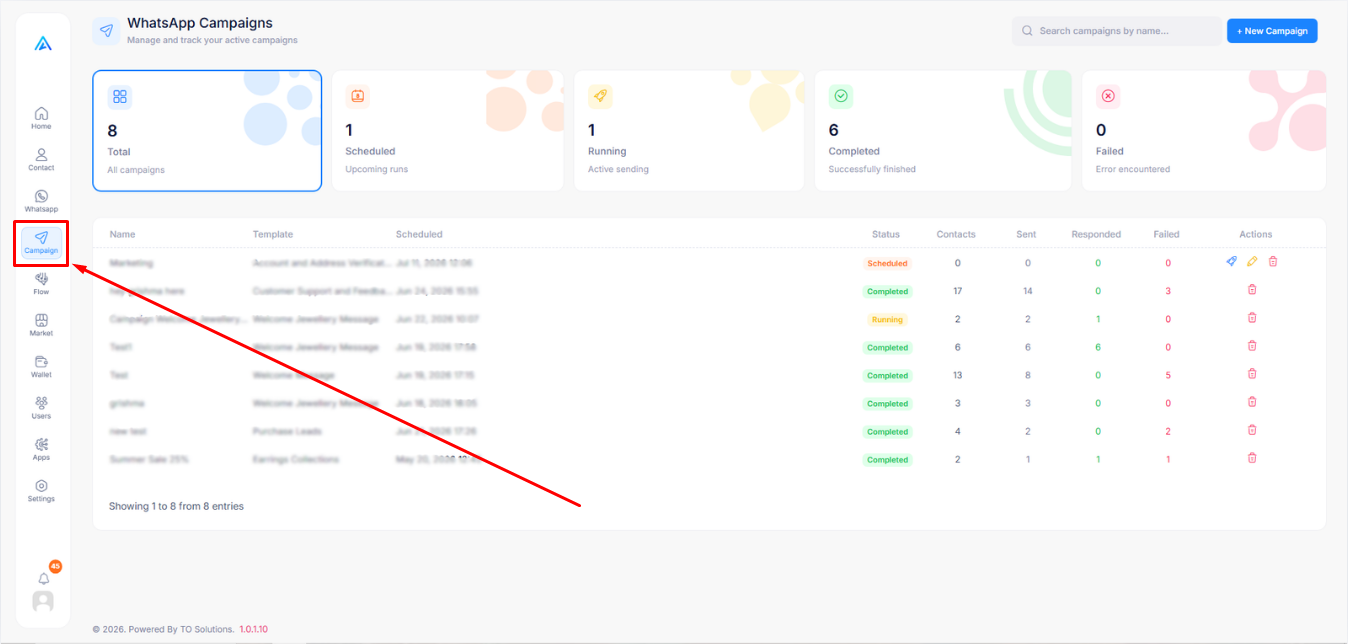
Step 2: Open the Campaigns Dashboard
Look at the main menu on the left side of your screen. Find and click the Campaigns icon (it looks like a paper airplane). This will open your main Campaigns Dashboard, where you can see a high-level overview of all your active, scheduled, and past broadcasts.
How to Search and View Campaigns
Easily find specific campaigns or review the details of existing ones.
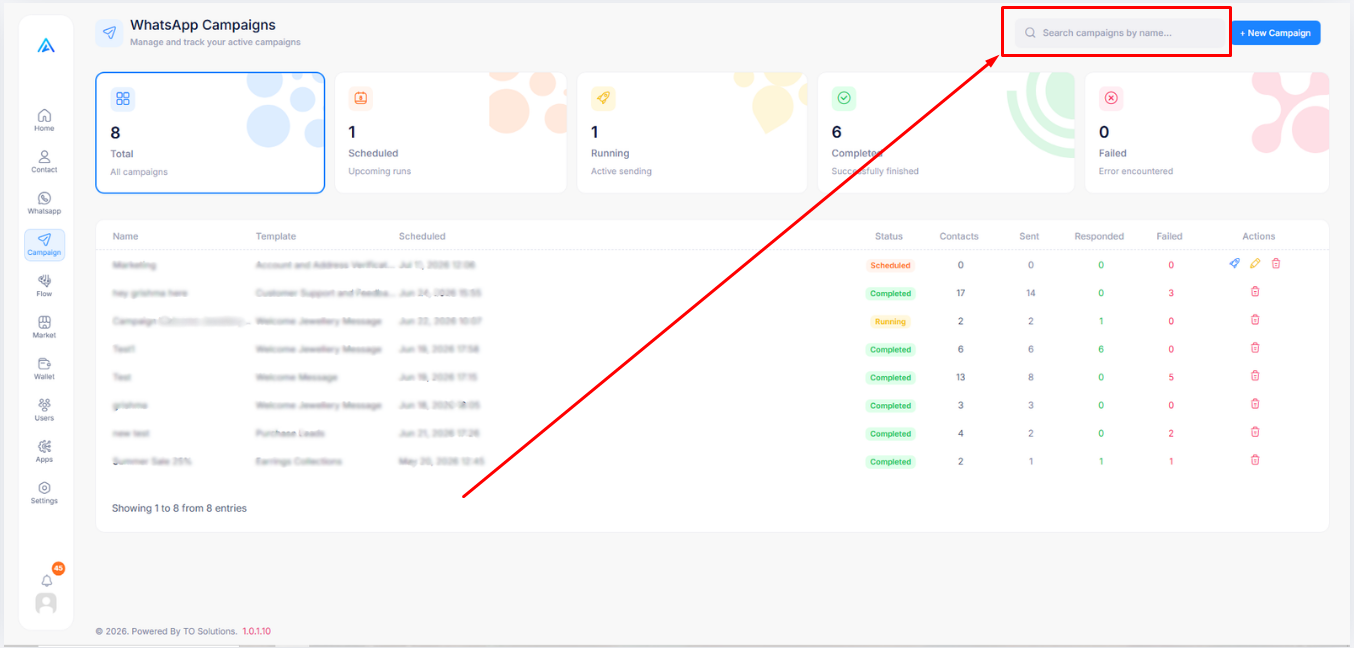
Step 1: Use the Search Bar
On the Campaigns Dashboard, use the search bar located above the campaigns list to quickly find campaigns by their name.
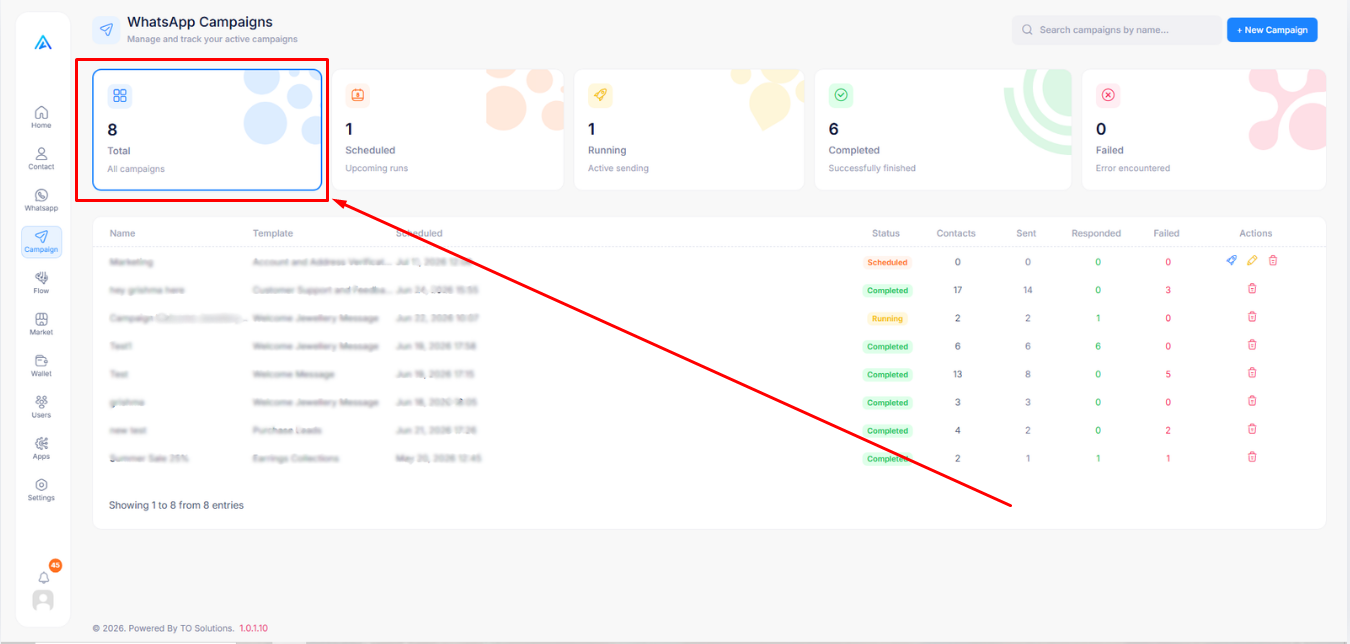
Step 2: Filter by Status
Click on the summary cards (Total, Scheduled, Running, Completed, Failed) at the top of the dashboard to filter the list and view campaigns with specific statuses.
How to View Campaign Details
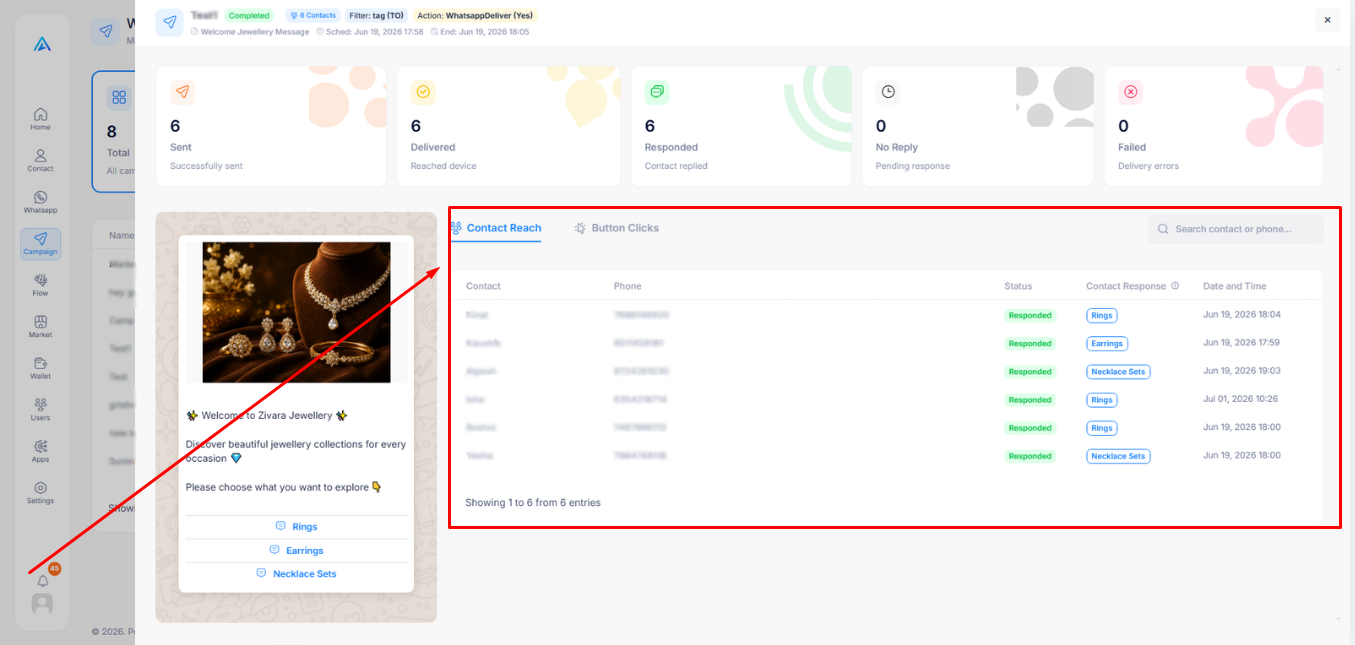
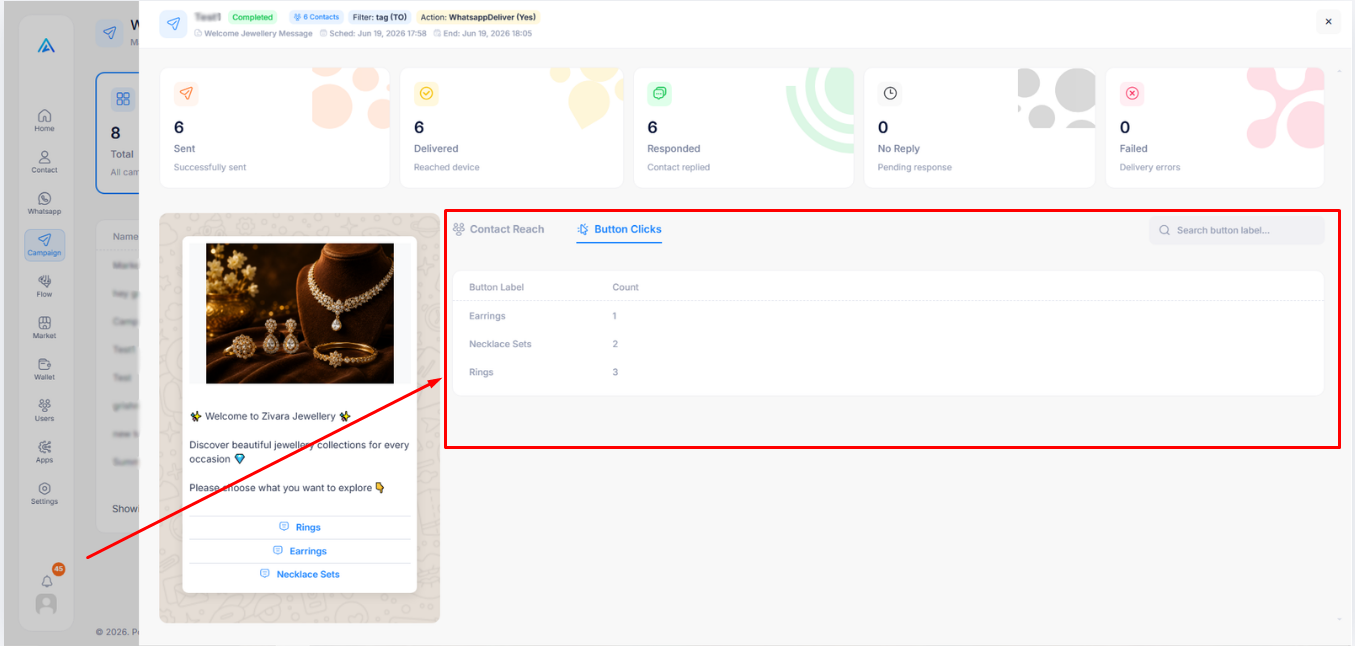
Click on any campaign in the list to open its detailed view and analyze the reach and engagement.
Step 1: Check Contact Reach
Navigate to the Contact Reach tab to see exactly who received the message, their delivery status, and their response.
Step 2: Monitor Button Clicks
Switch to the Button Clicks tab to analyze how many times specific template buttons (like Quick Replies or Call-to-Action) were clicked by your audience.
How to Create a New Campaign
Setting up a new marketing campaign takes just a few clicks.
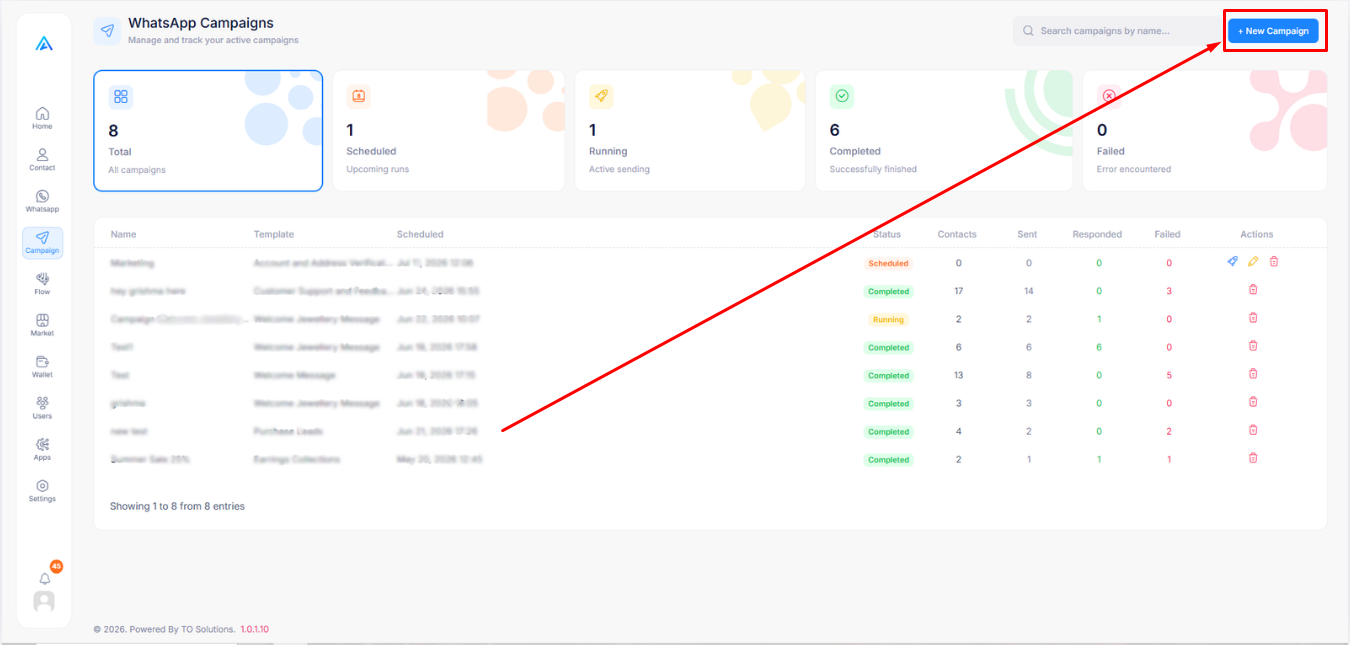
Step 1: Open the Creation Form
Click the blue + New Campaign button located in the top right corner of the Campaigns page.
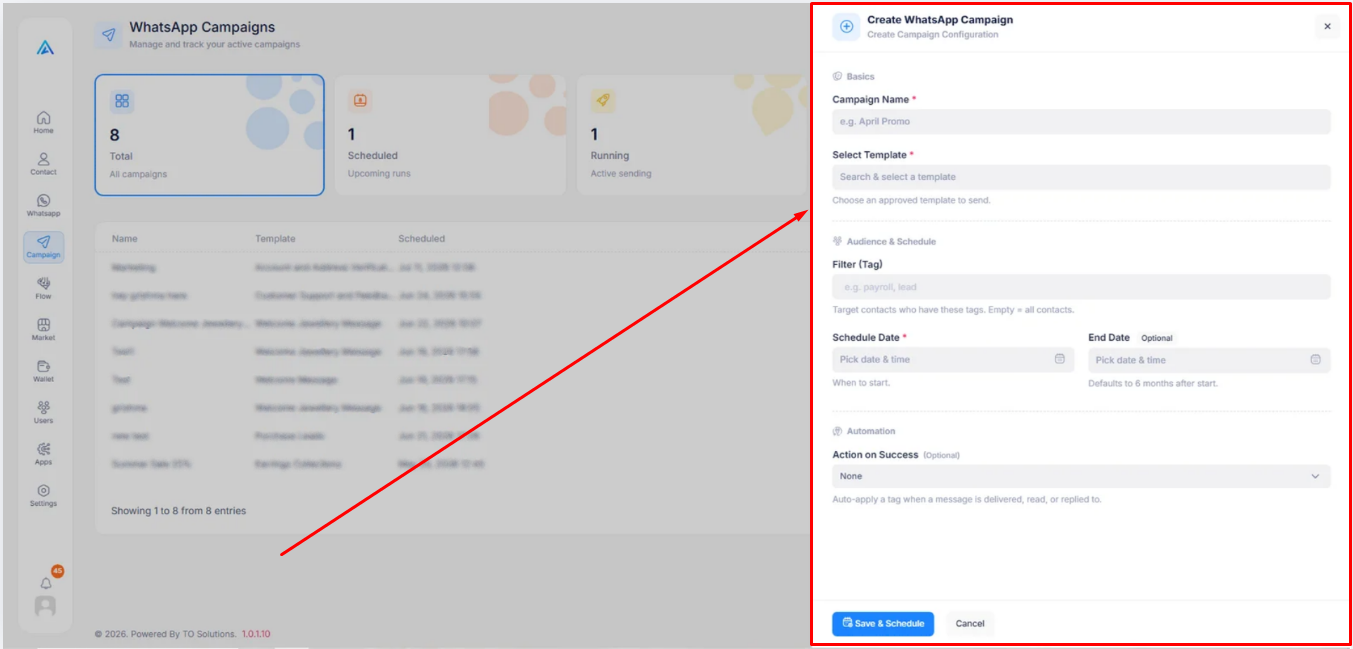
Step 2: Fill in Campaign Details
Enter a descriptive Campaign Name and select an approved Message Template. Then, specify your target audience by selecting the relevant Filter (Tag). Finally, pick a Schedule Date and optionally configure an Action on Success.
Step 3: Save & Schedule
Once all configurations are set, click the blue Save & Schedule button at the bottom to queue your campaign for broadcasting.
How to Edit a Campaign
You can modify campaigns that are scheduled or saved as drafts before they start sending.
Step 1: Locate the Campaign
Find the campaign you want to edit in the campaigns list. Remember, you can only edit campaigns that have not yet started (e.g., Scheduled or Draft status).
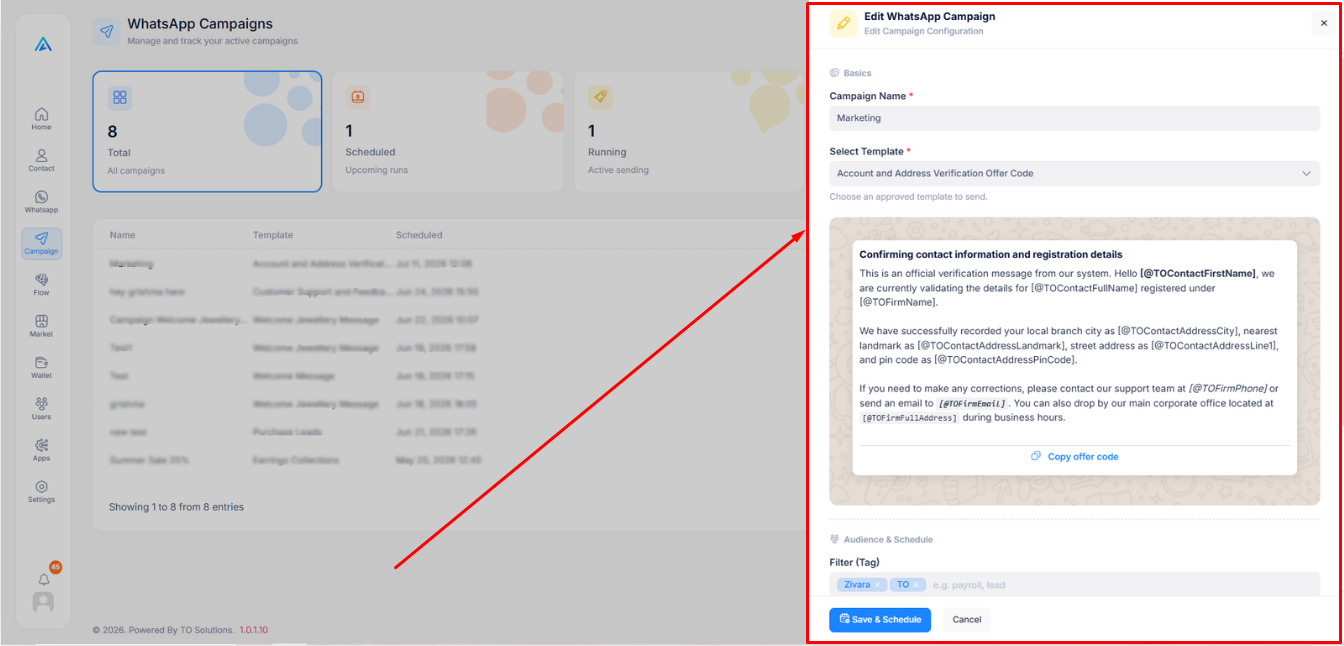
Step 2: Click the Edit Icon
Click the Edit (pencil) icon in the Actions column for that campaign. This will open the campaign configuration form where you can update the details and save your changes.
How to Quick Run or Delete a Campaign
Manage your scheduled campaigns directly from the campaigns list with one-click actions.
Step 1: Run Immediately (Quick Run)
If you want to start a scheduled campaign right away, click the Quick Run (rocket) icon in the Actions column. The campaign will ignore its scheduled time and start sending immediately.
Step 2: Delete Campaign
To permanently remove a campaign, click the Delete (trash) icon in the Actions column. Please note that this action cannot be undone.