Management & Logs
The Campaigns Module is your command center for broadcasting targeted messages, automating outreach, and tracking engagement. By utilizing powerful segments and dynamic variables, you can send personalized WhatsApp campaigns at scale.
Workflow Management & Logs
The workflow management interface allows you to view, create, monitor, and troubleshoot all your automated flows from one centralized dashboard.
How to Access the Workflows Module
Before you can automate your processes, you need to navigate to the Workflows dashboard.
Step 1: Log in
Log in to your account to view your main dashboard.
Step 2: Open the Workflows Page
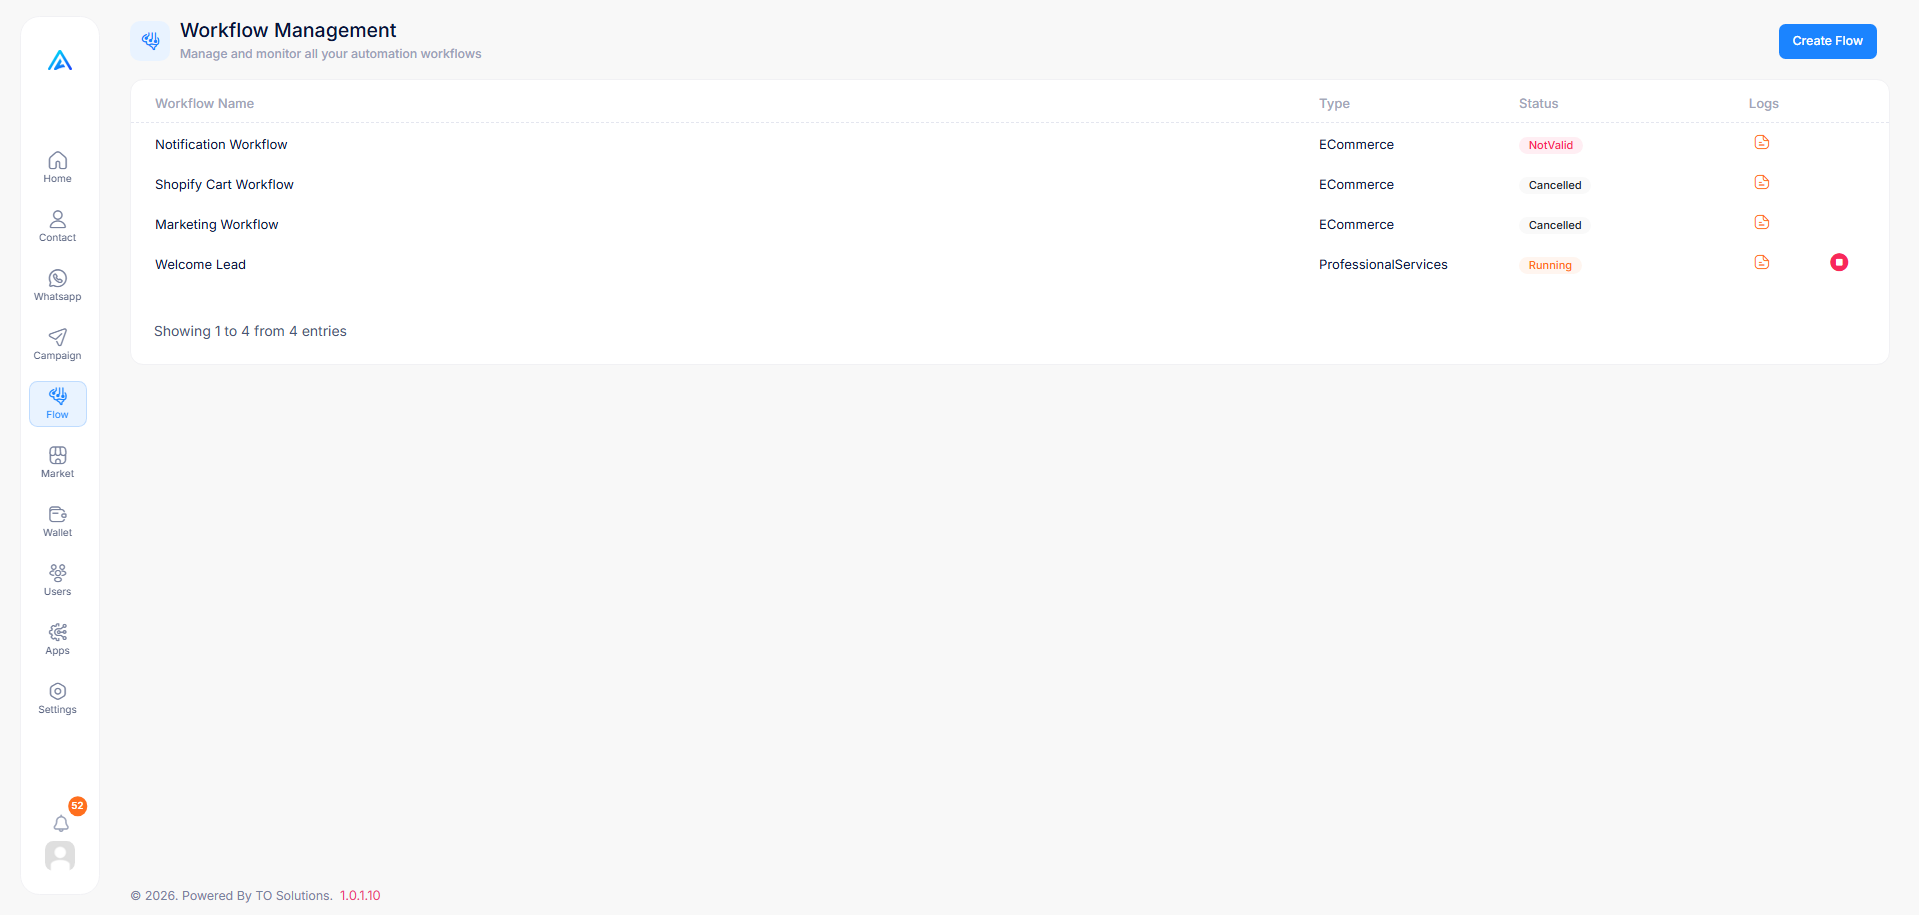
Look at the main menu on the left side of your screen and find the Flow icon. Clicking it will reveal a dropdown menu with three options: Management, Create, and Logs. Click on Management to open the Workflow Management dashboard.
How to Create a Workflow
Follow these steps to initialize a new automated workflow.
Step 1: Click Create Flow
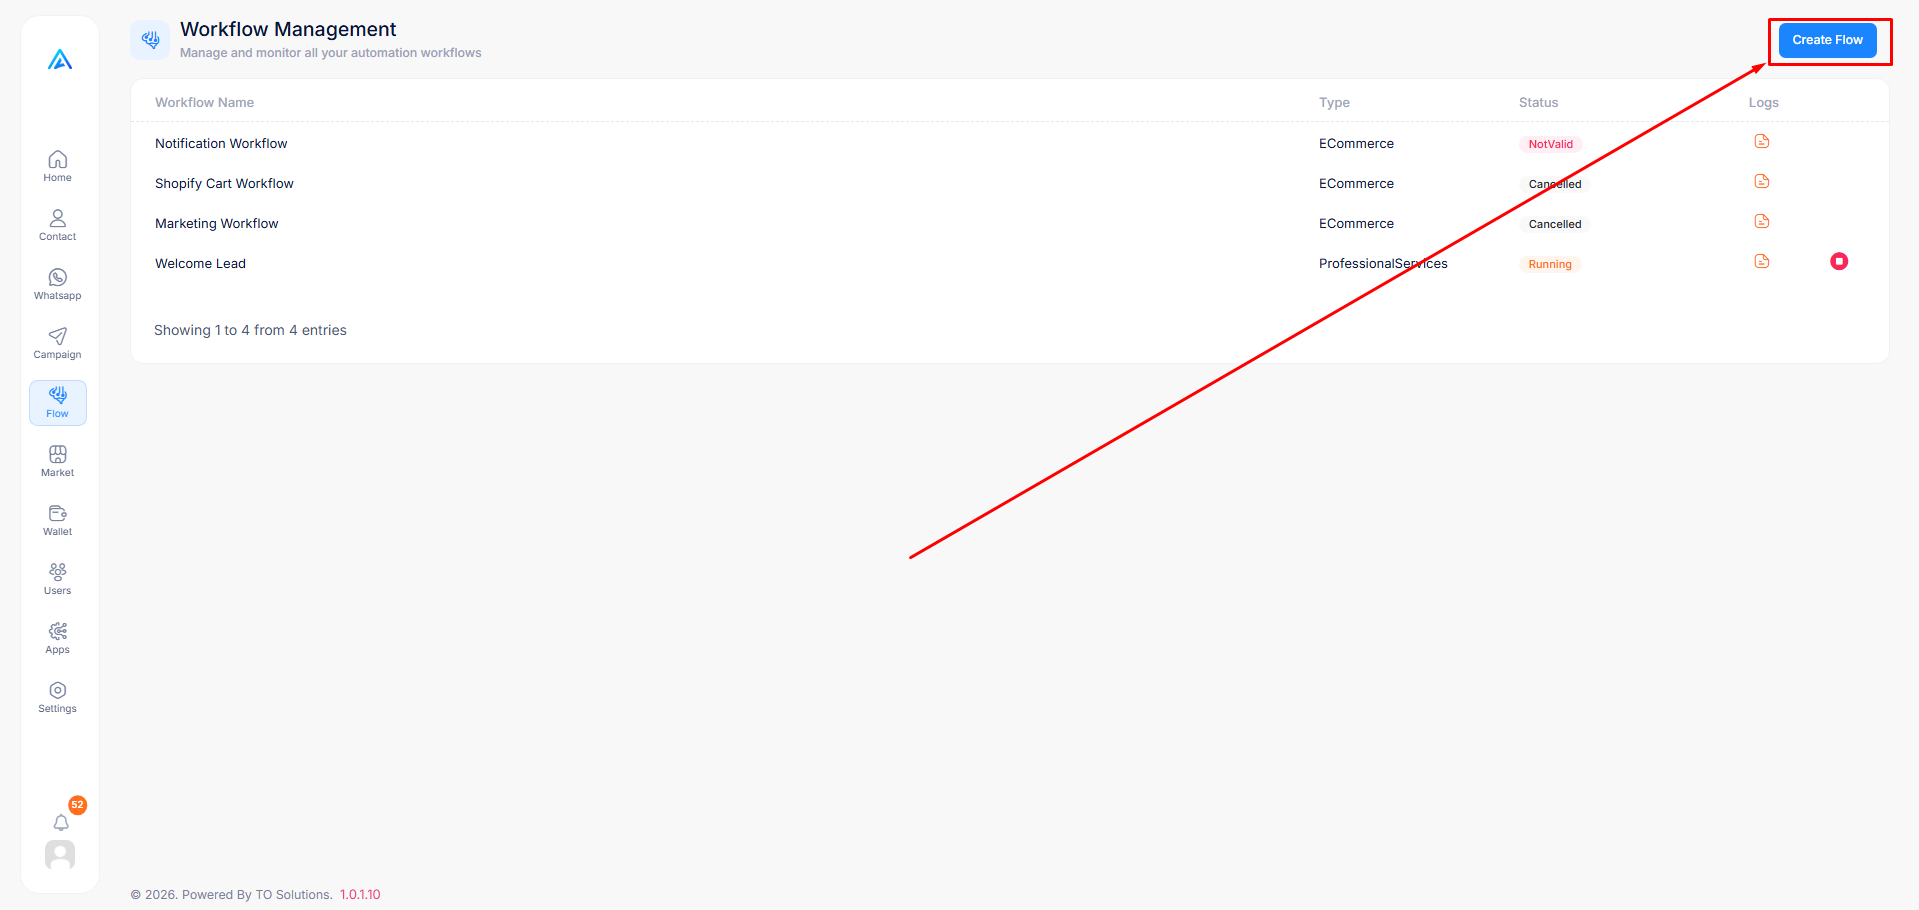
Navigate to the Management screen and click the blue Create Flow button located in the top right corner.
Step 2: Fill in Configuration Details
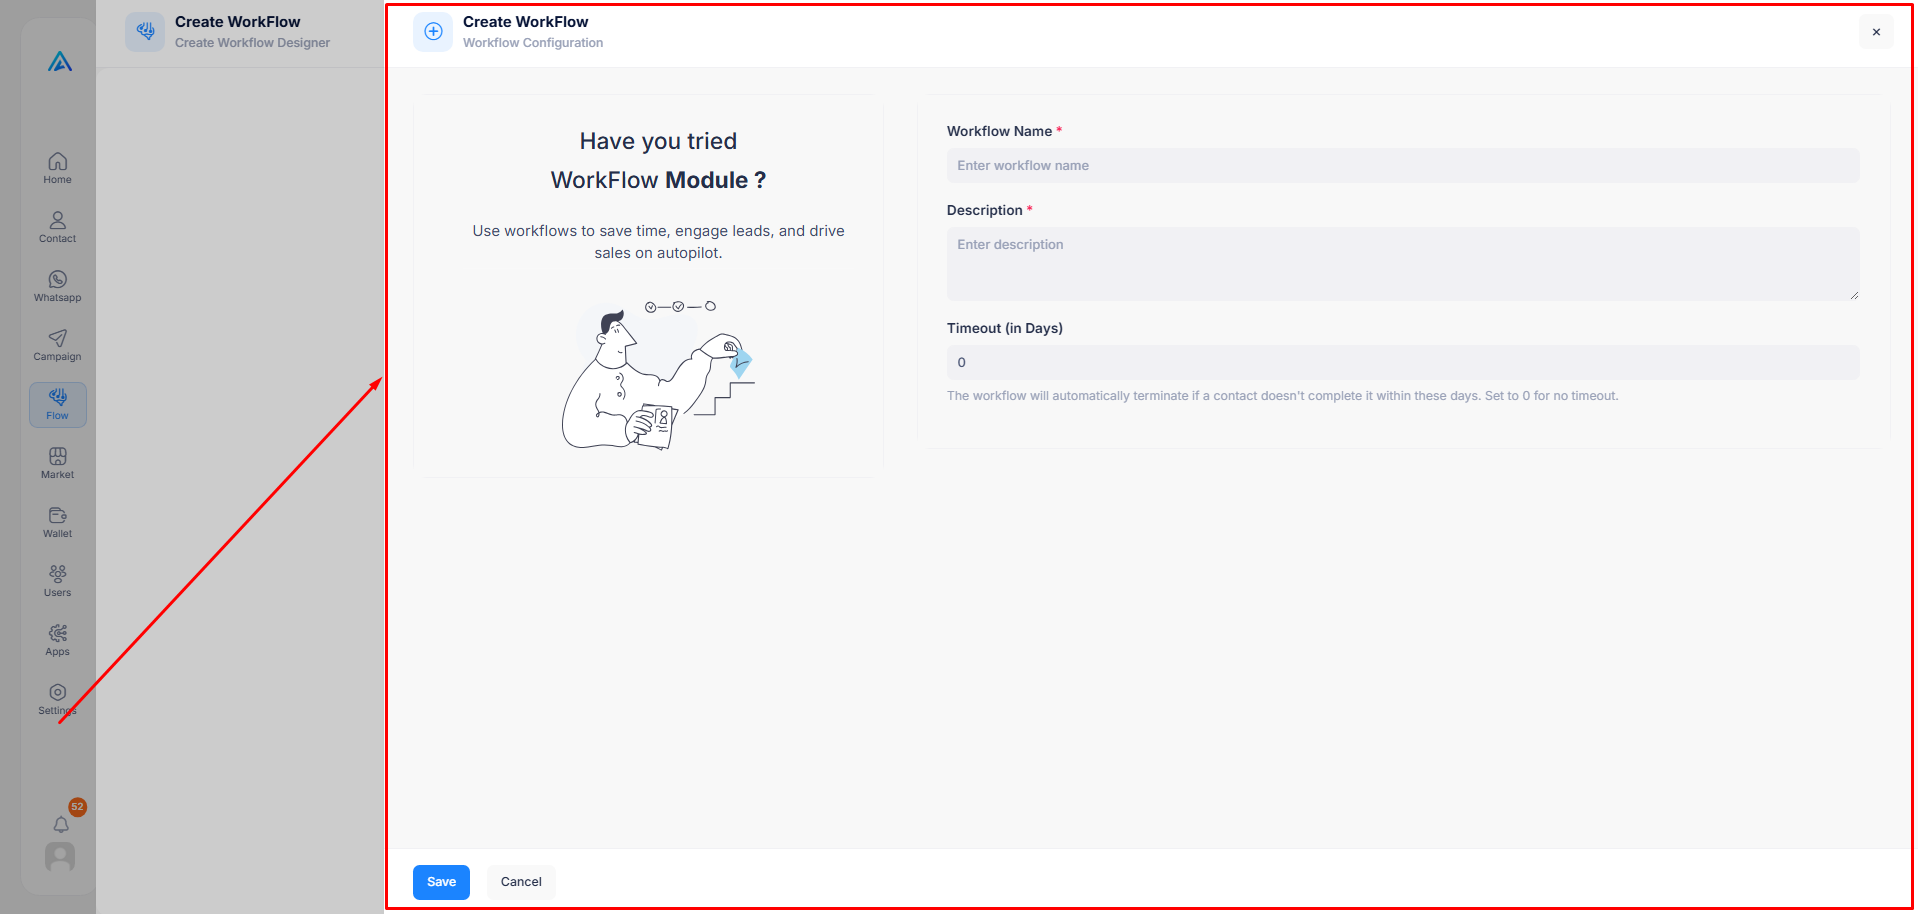
You will be prompted to provide essential details for your new flow:
- Workflow Name: A descriptive name (e.g., "Welcome Lead").
- Description: A brief summary of what the flow does.
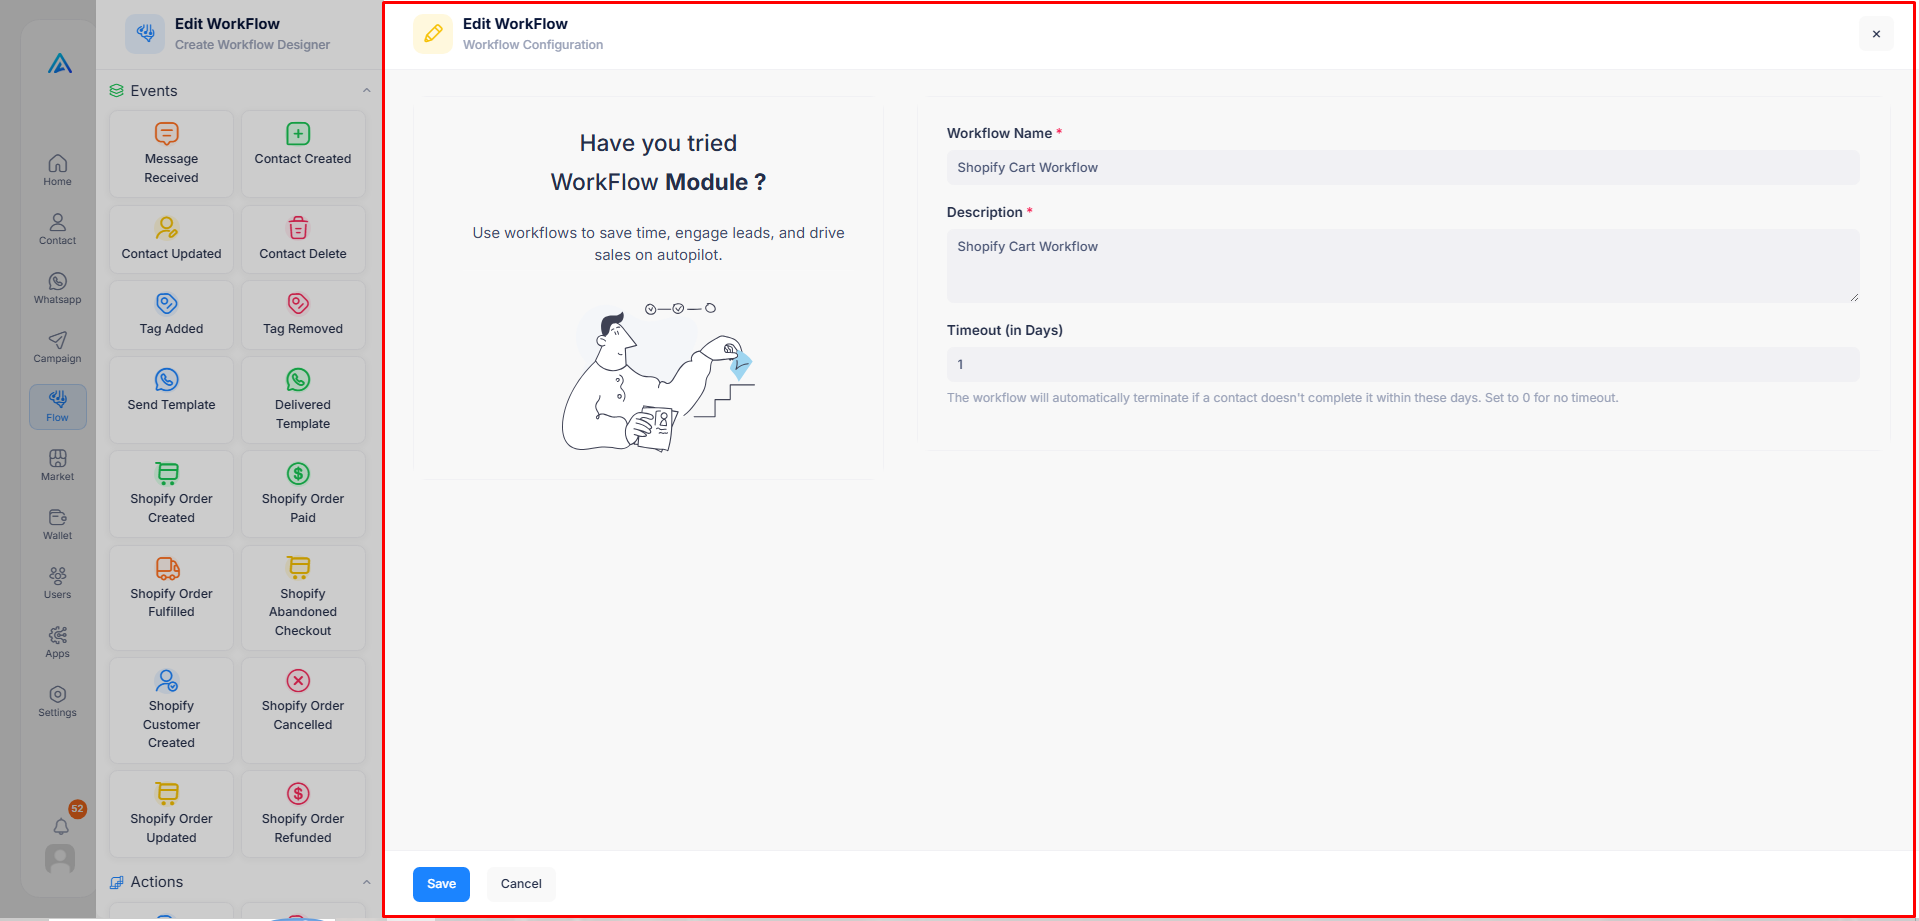
- Timeout (in Days): This acts as a safety measure. The workflow will automatically terminate if a contact doesn't complete the flow within this timeframe. Set to 0 for no timeout.
How to Edit a Workflow
Make changes to your existing automations easily.
Step 1: Open the Designer
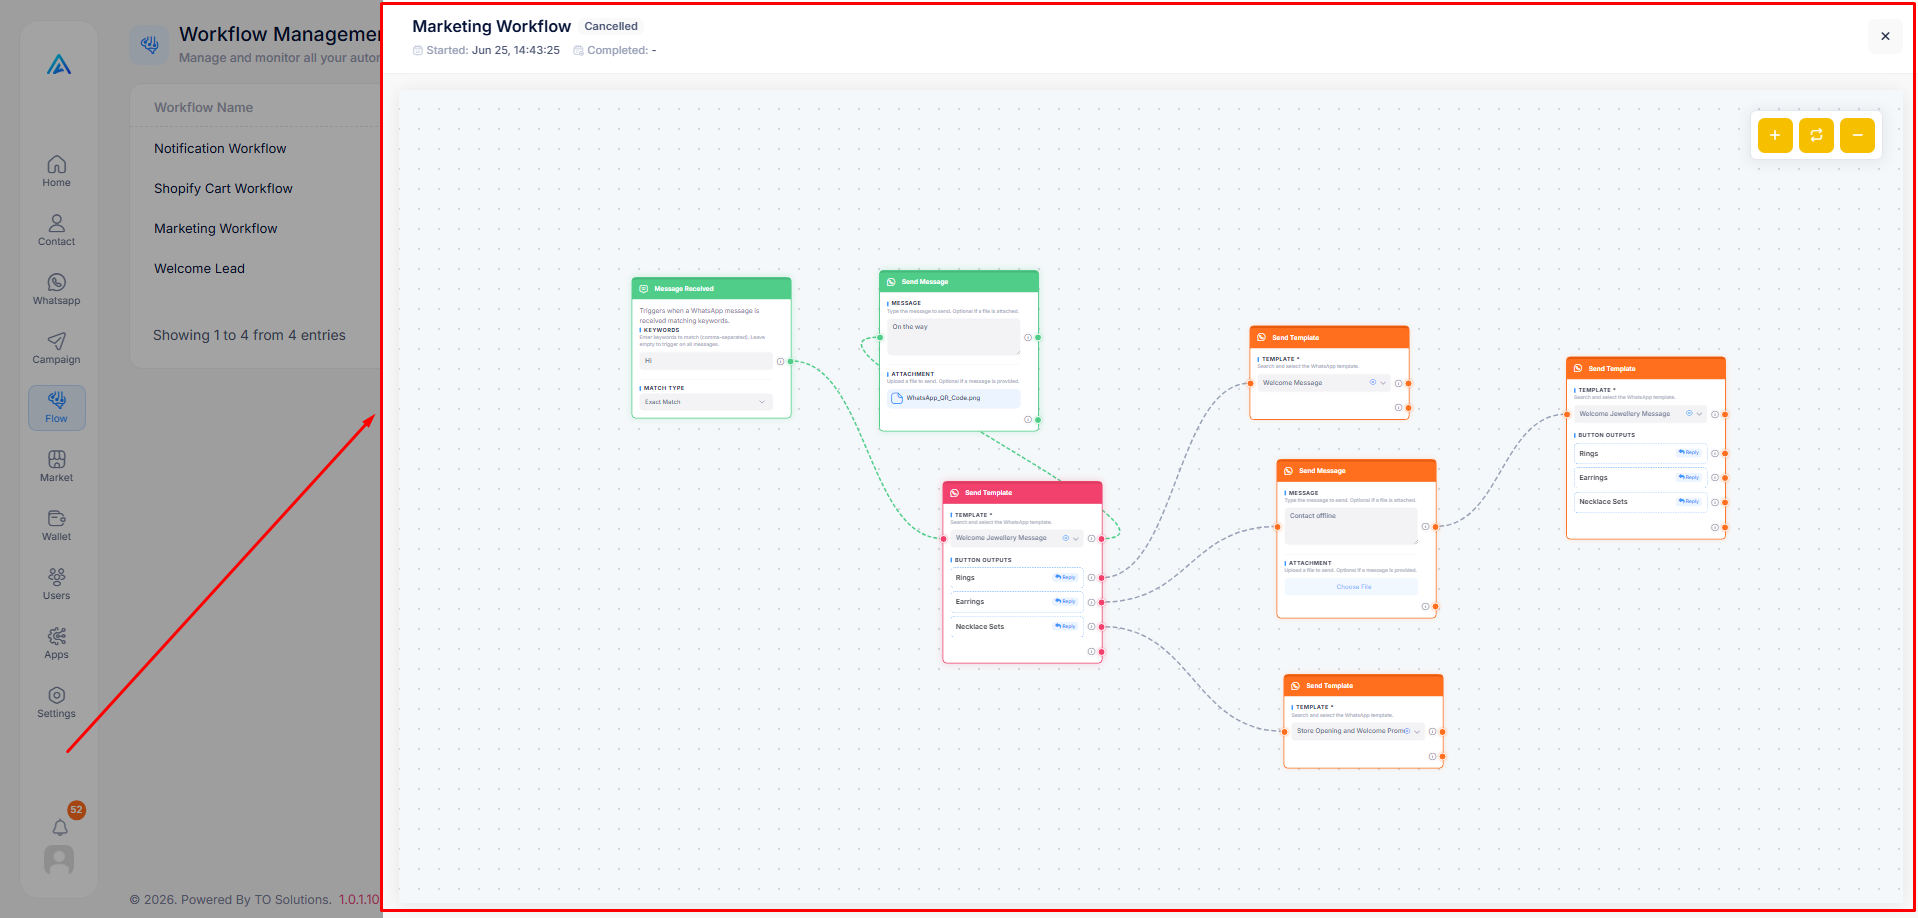
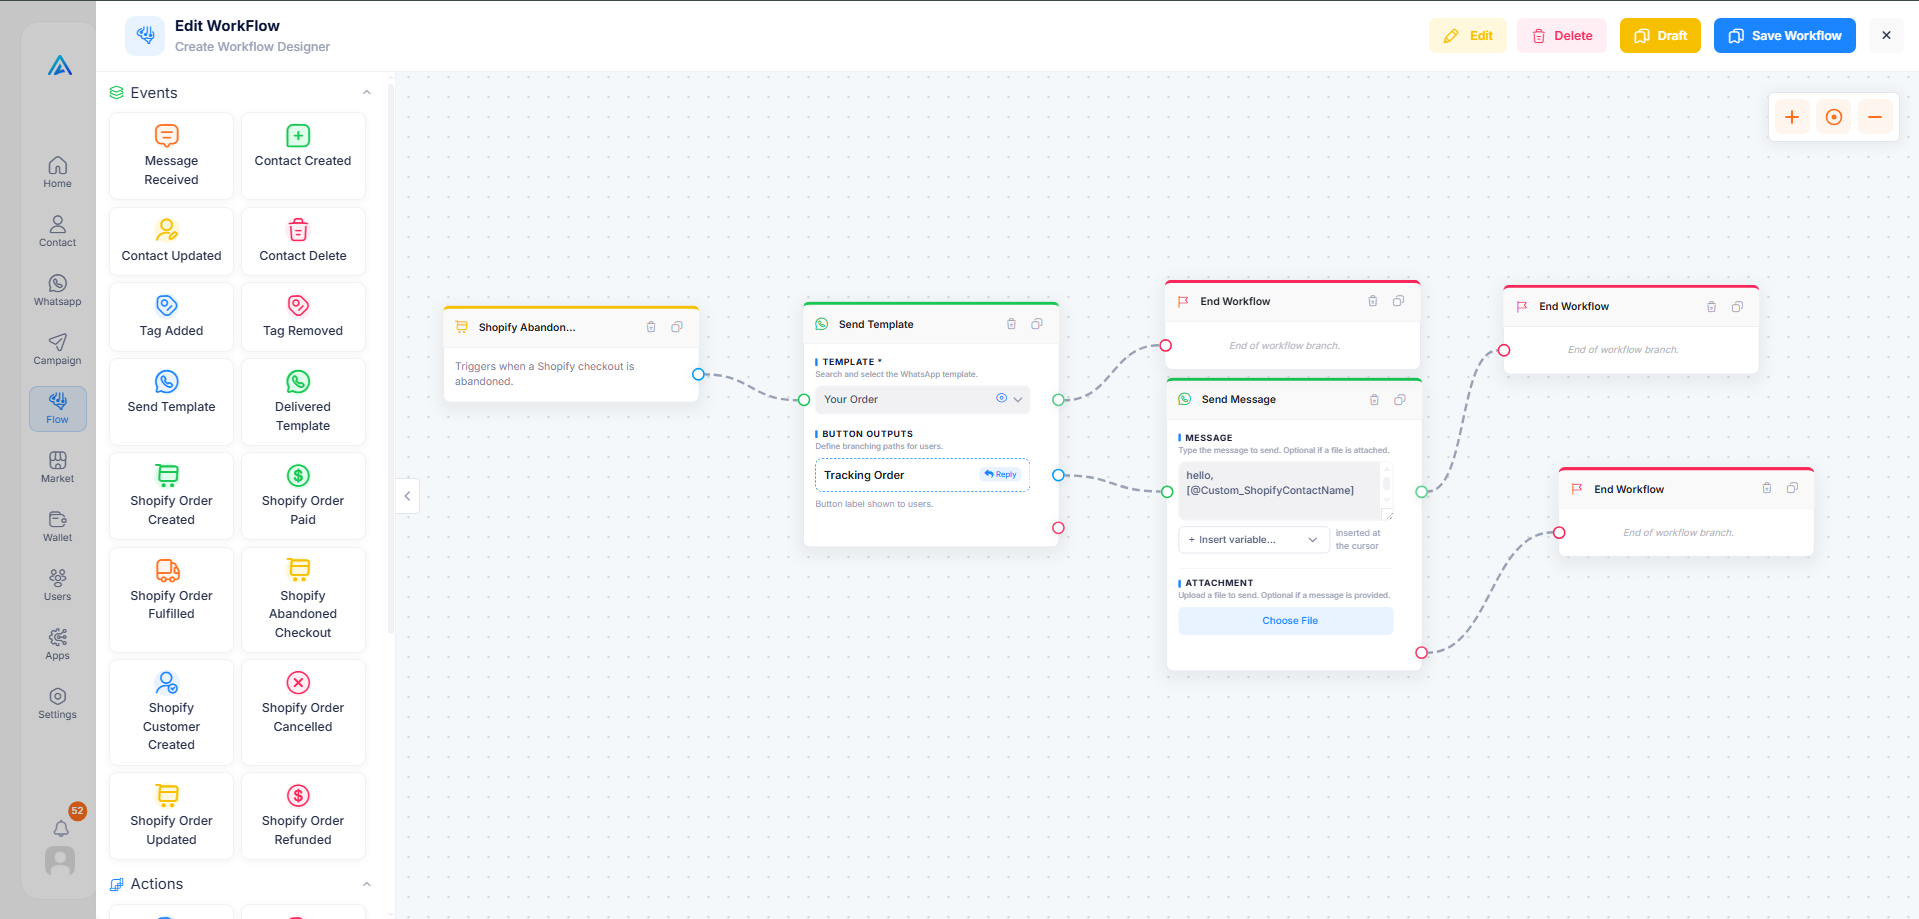
From the Management dashboard, click on the name of any workflow. This will open the visual Workflow Designer where you can modify triggers, messages, and connections just like in the image.
Step 2: Edit Workflow Configuration
To change the basic settings, click the yellow Edit button located in the top right corner. Please note that this button is exclusively used to modify the following data:
- Workflow Name
- Description
- Timeout (in Days)
How to Monitor Workflow Status
Keep track of which automations are currently active or halted.
Step 1: Open the Management Tab
Go to the Management tab to view a table of all your workflows.
Step 2: Check the Status Column
Look at the Status column to understand the current state of your automation:
- Running The workflow is active and processing events.
- Cancelled The workflow has been manually stopped.
- NotValid The workflow has configuration errors and cannot run.
Step 3: Stop an Active Workflow
If you need to halt an active automation, click the Stop icon located on the screen next to the workflow. The workflow will immediately stop running, and its status will automatically change from Running to Cancelled.
How to View Execution Logs
Detailed history of every automated run is recorded in the Logs section. There are two primary ways to access these logs.
Step 1: From the Global Logs Menu
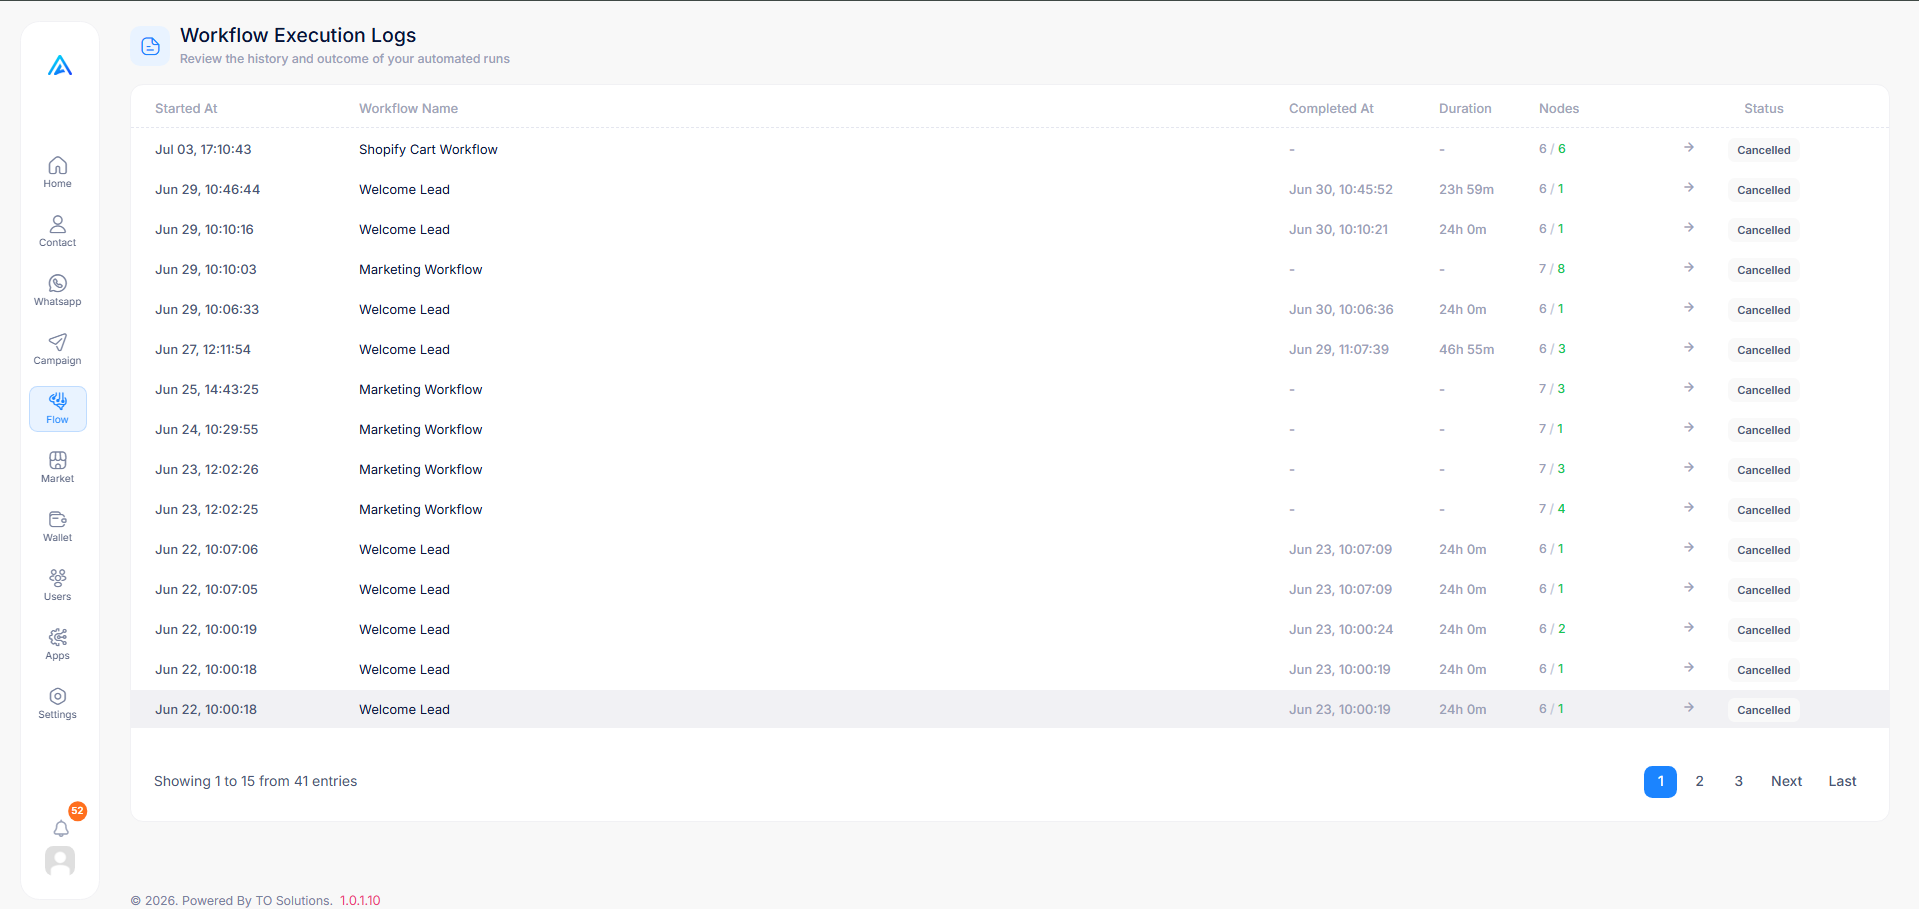
Look at the main menu on the left side, expand the Flow icon, and select Logs. This page displays a comprehensive list of all executions across all your workflows. Clicking on any specific execution row here will also open the detailed visual playback popup (as shown in Step 3).
Step 2: From the Management Table
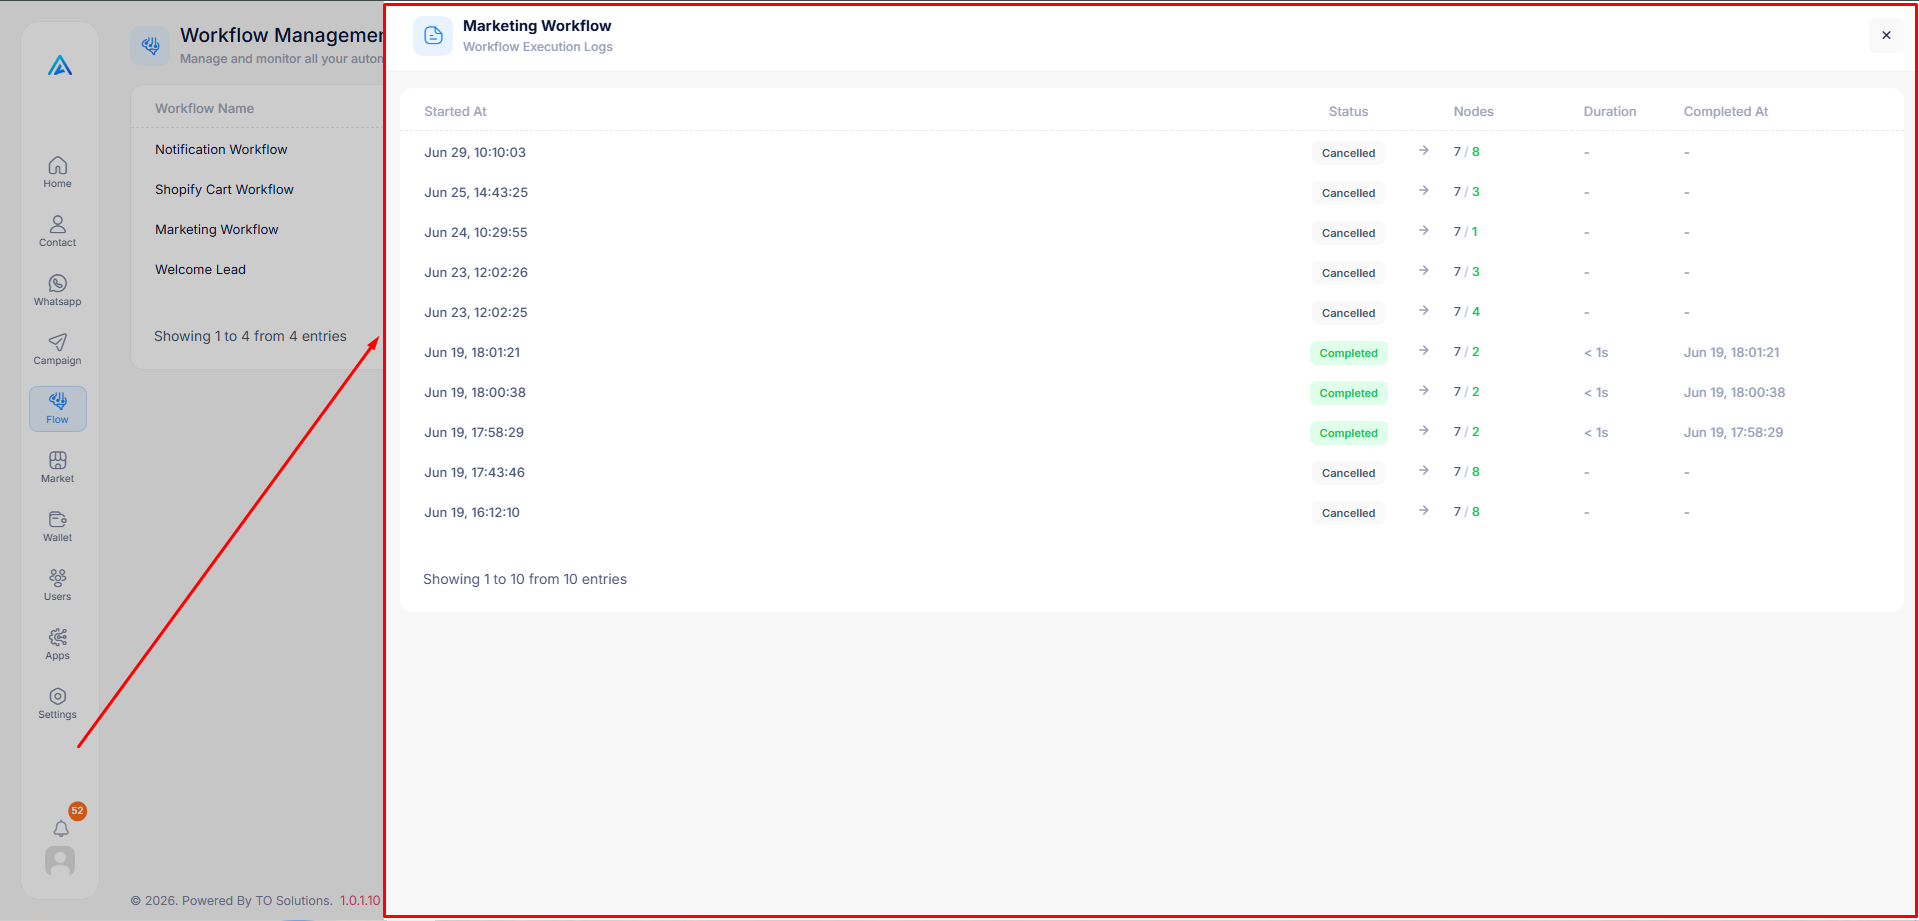
In the Management list, look for the Logs column. Click the log icon on a specific workflow to open its specific execution logs popup.
Step 3: Viewing Visual Playback
Regardless of how you access the logs, clicking on any execution row in the logs table will open a visual popup (as shown below). This popup highlights the exact path taken during that specific run.