Contacts
The Contacts Module is the central hub for managing your customer relationships, audience data, and engagement history. Think of it as a smart, dynamic address book that powers all your marketing campaigns, workflows, and customer support interactions.
Managing Contacts
The contact management interface allows you to view, filter, create, and bulk-update your entire audience from one centralized dashboard.
How to Access the Contacts Module
Before you can manage your audience, you need to navigate to the Contacts dashboard.
Step 1: Log in
Log in to your account to view your main dashboard.
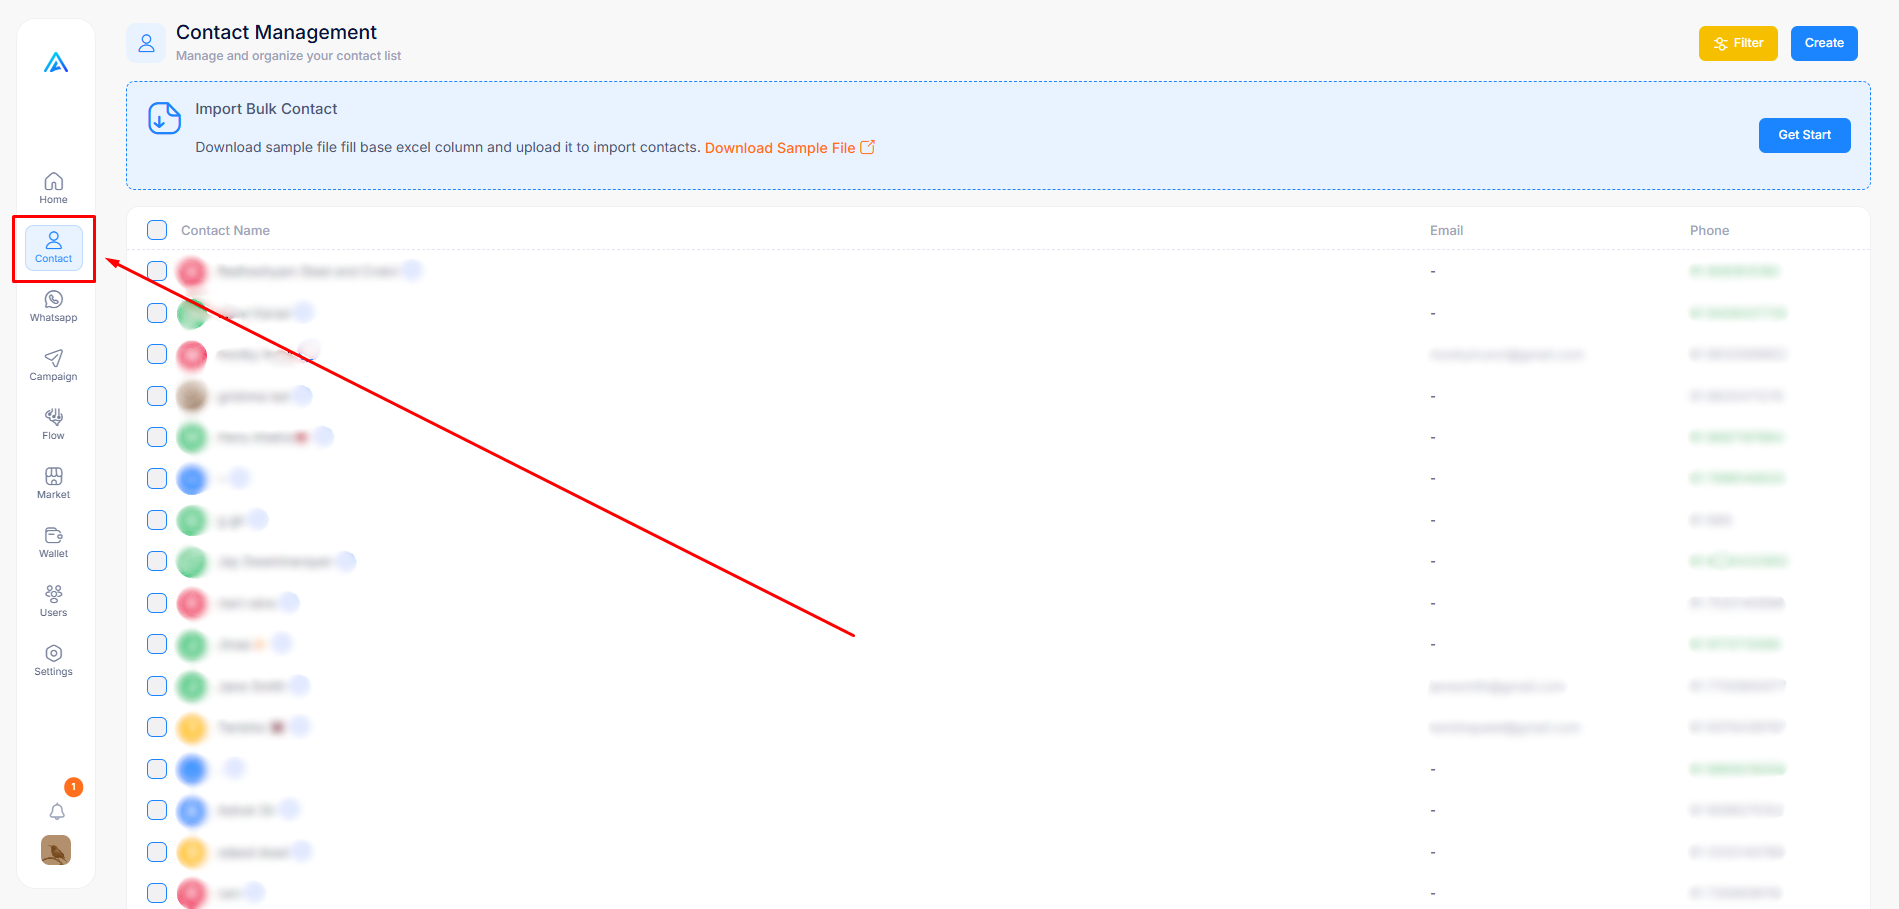
Step 2: Open the Contacts Page
Look at the main menu on the left side of your screen. Find and click the Contact icon (it looks like a person's profile) to open the Contact Management dashboard.
How to Search and View Contacts
Find the exact customer you are looking for in seconds.
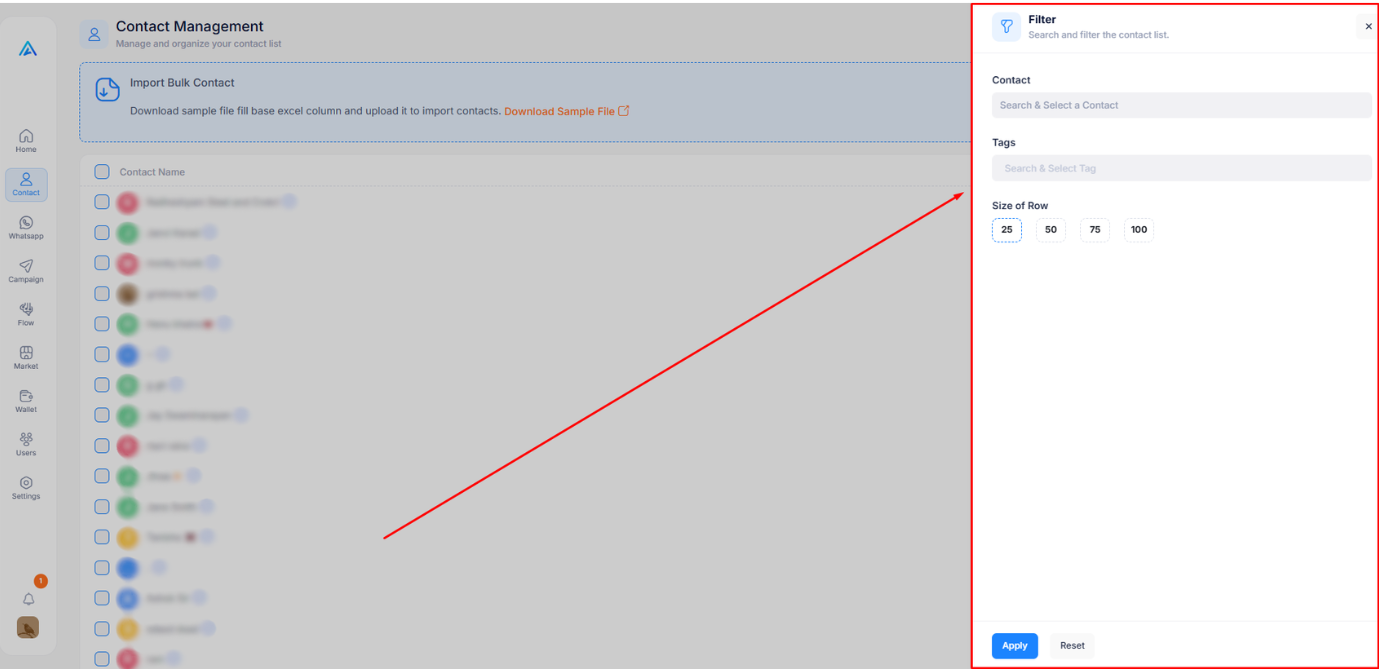
Step 1: Open the Filter Panel
Click the yellow Filter button at the top right of the dashboard. A panel will slide out where you can search for a specific contact by name, filter your list by Tags, and choose how many rows to display (25, 50, 75, or 100).
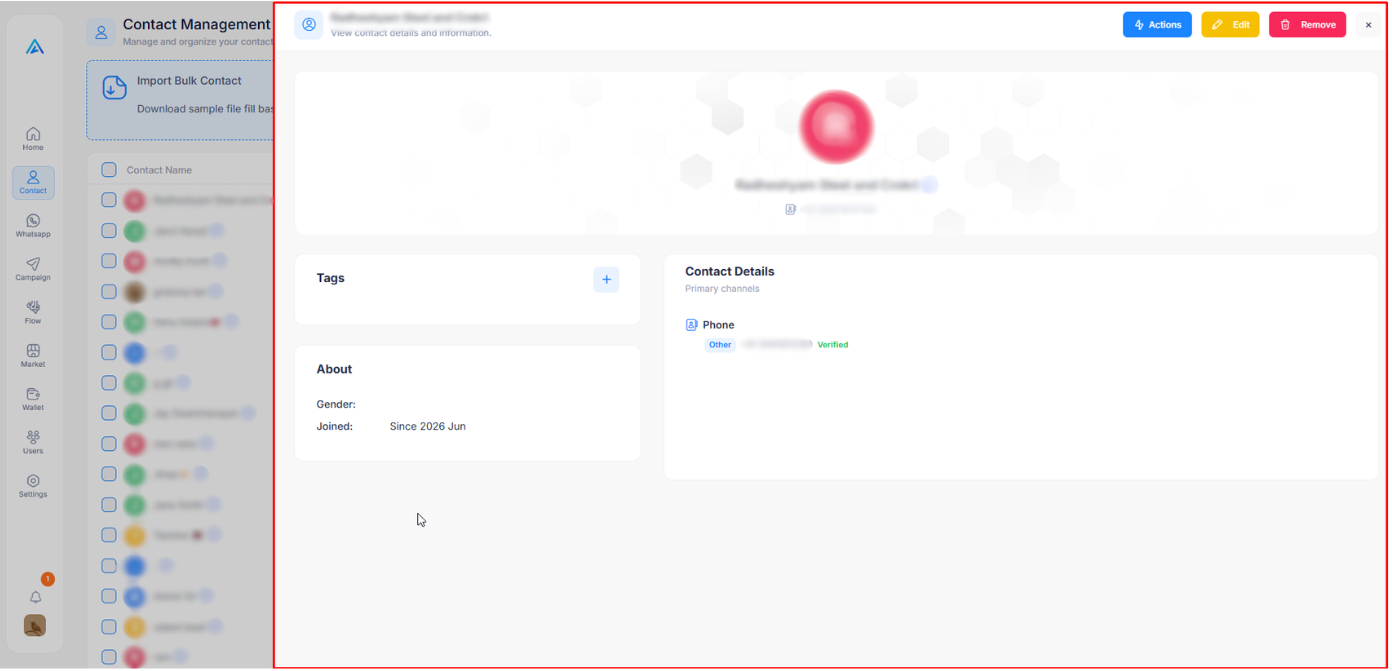
Step 2: Open the Quick View Panel
Click anywhere on a contact's row in the table. Their full profile will instantly slide out from the right side, showing all their details and assigned Tags.
How to Create a New Contact
Adding a new customer profile manually is quick and easy.
Step 1: Open the Creation Form
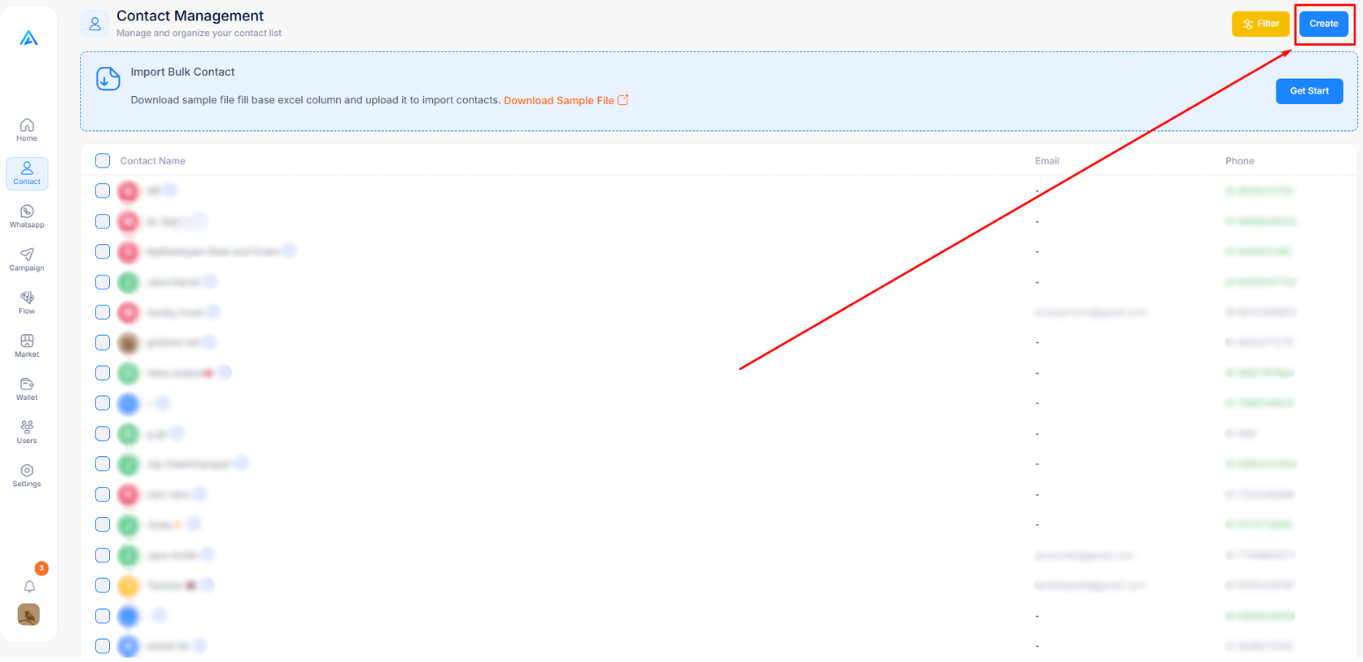
Click the blue Create button located in the top right corner of the Contacts page.
Step 2: Fill in Contact Details
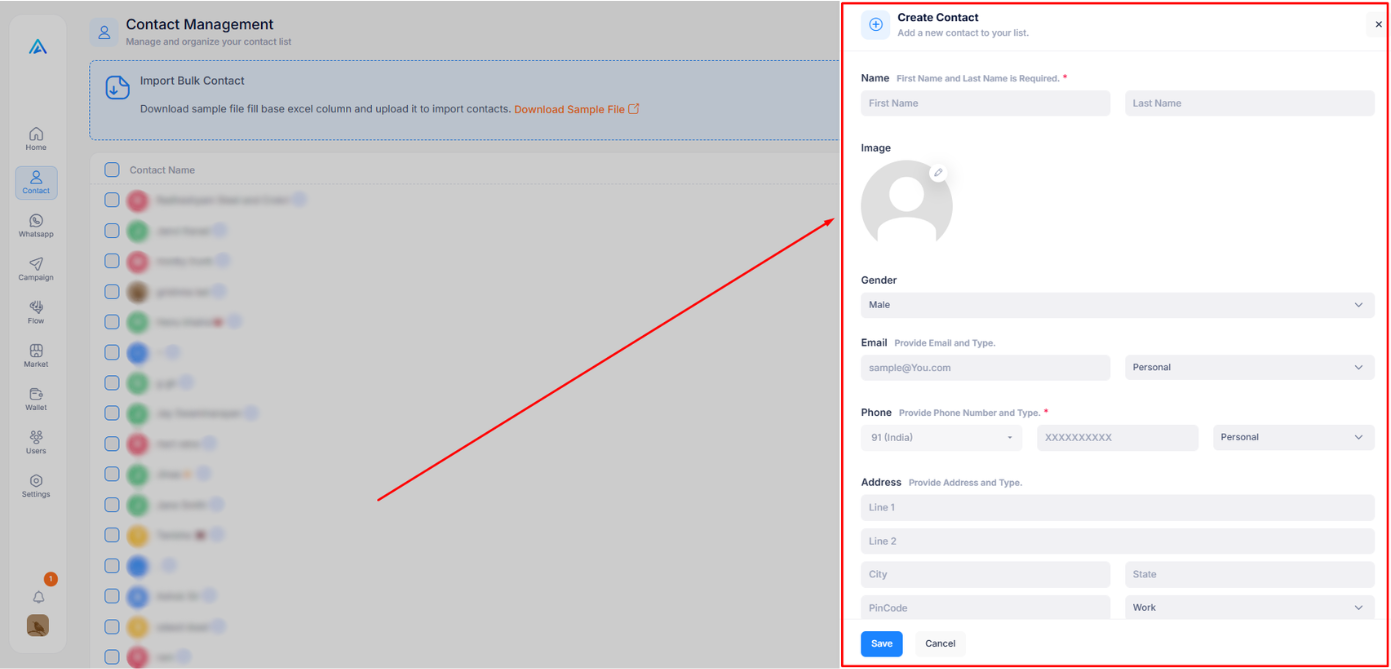
A panel will slide out from the right side. Enter the customer's First Name, Last Name, Phone Number, and Email.
Step 3: Save
Click the blue Save button at the bottom of the panel to add them to your database.
How to Edit or Remove a Contact
Update a customer's phone number or permanently delete their profile.
Step 1: Open the Contact details
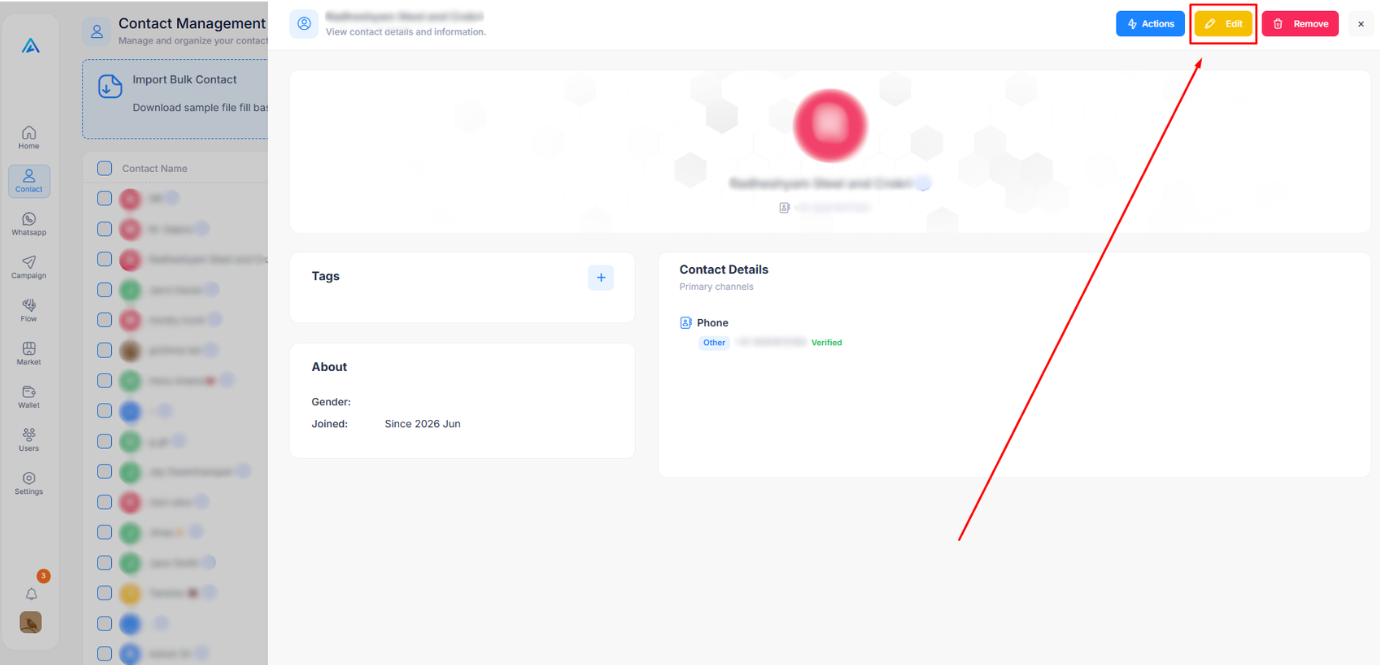
Click on the contact's row to open their Quick View panel.
Step 2: Choose an Action
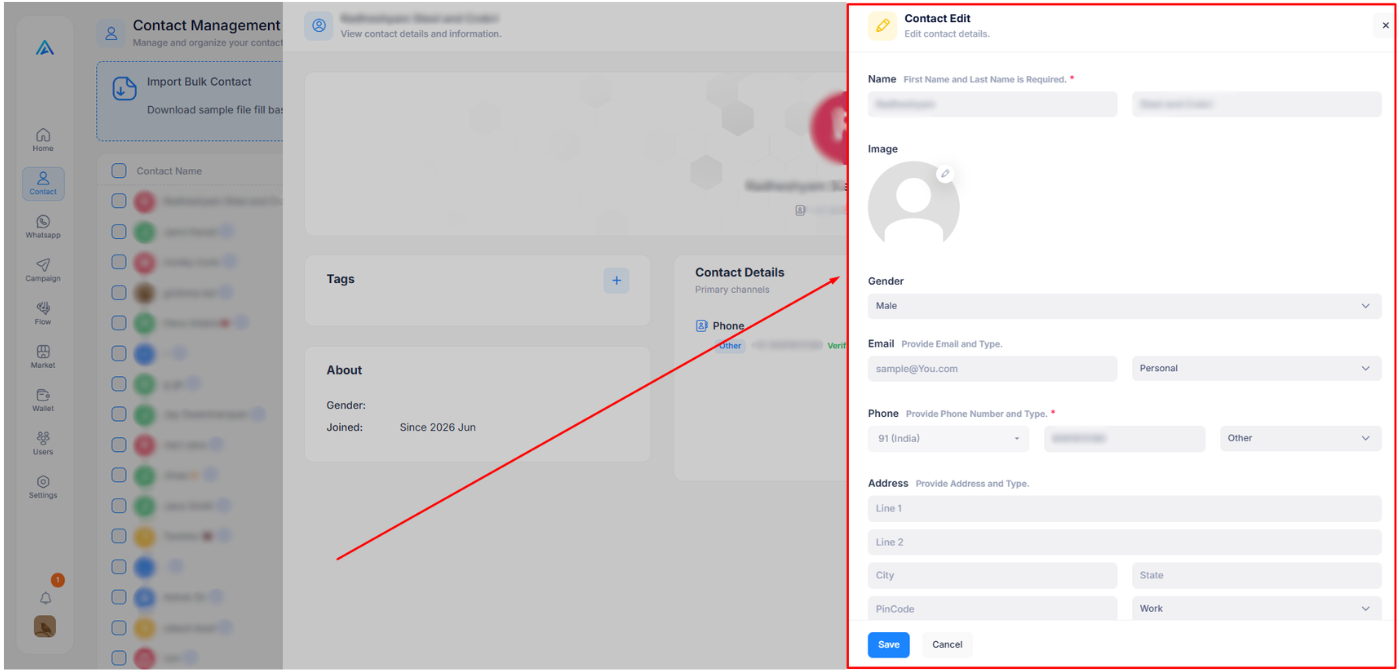
In the top right corner of the panel, click the yellow Edit button to open the edit form, or the red Remove button to delete them.
How to Perform Bulk Actions
Manage hundreds of contacts at once with the Multi Action Contact panel.
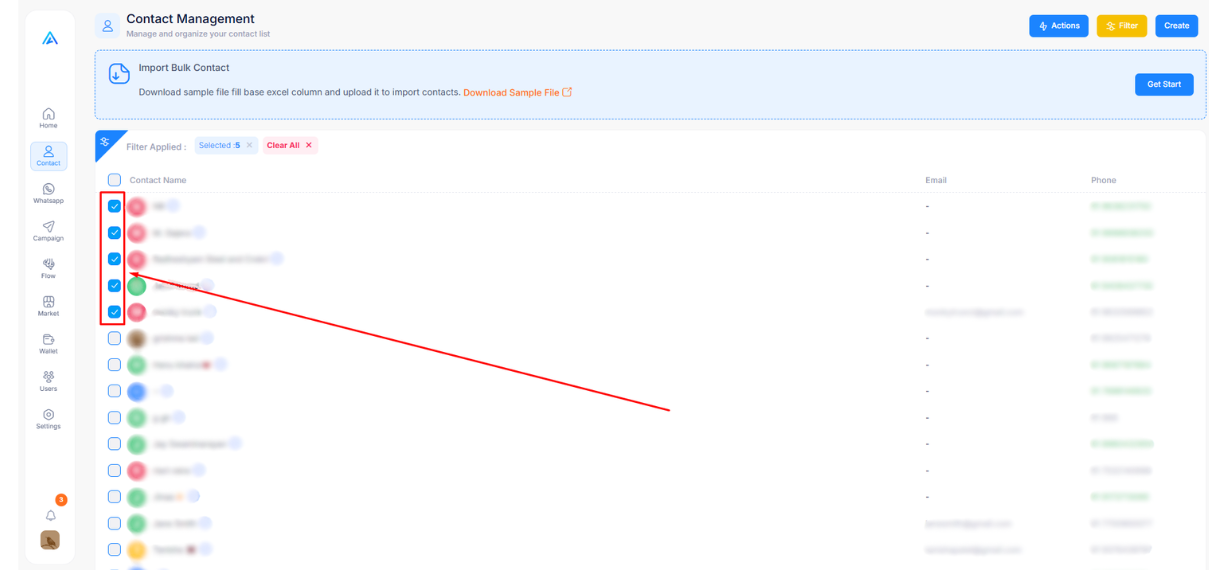
Step 1: Select Multiple Contacts
Click the checkboxes on the left side of the table next to the contacts you want to manage. To select everyone on the page, click the master checkbox at the top of the column.
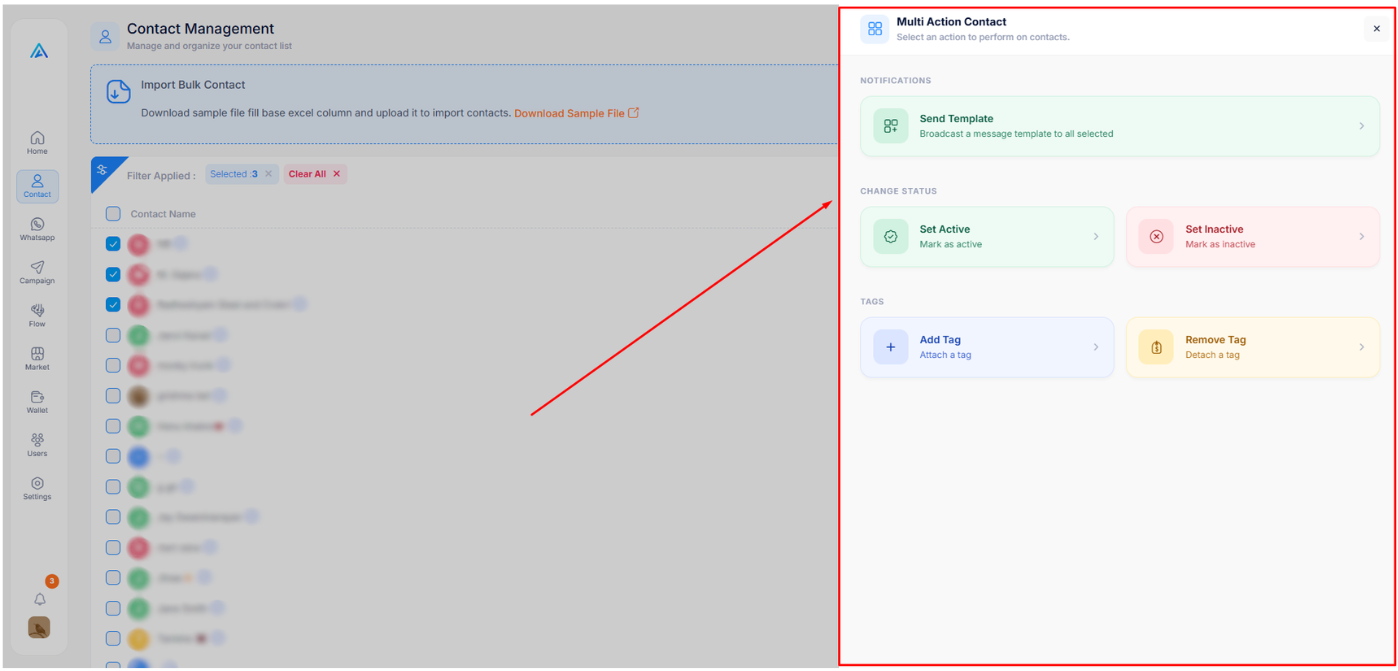
Step 2: Choose your Bulk Action
The Multi Action Contact panel will slide out from the right side of the screen. Here you can perform actions on all selected contacts at once, such as Sending a Template, changing their status (Set Active / Set Inactive), or managing their labels (Add Tag / Remove Tag).
How to Export Contacts
Download your audience data to use in other tools or for reporting.
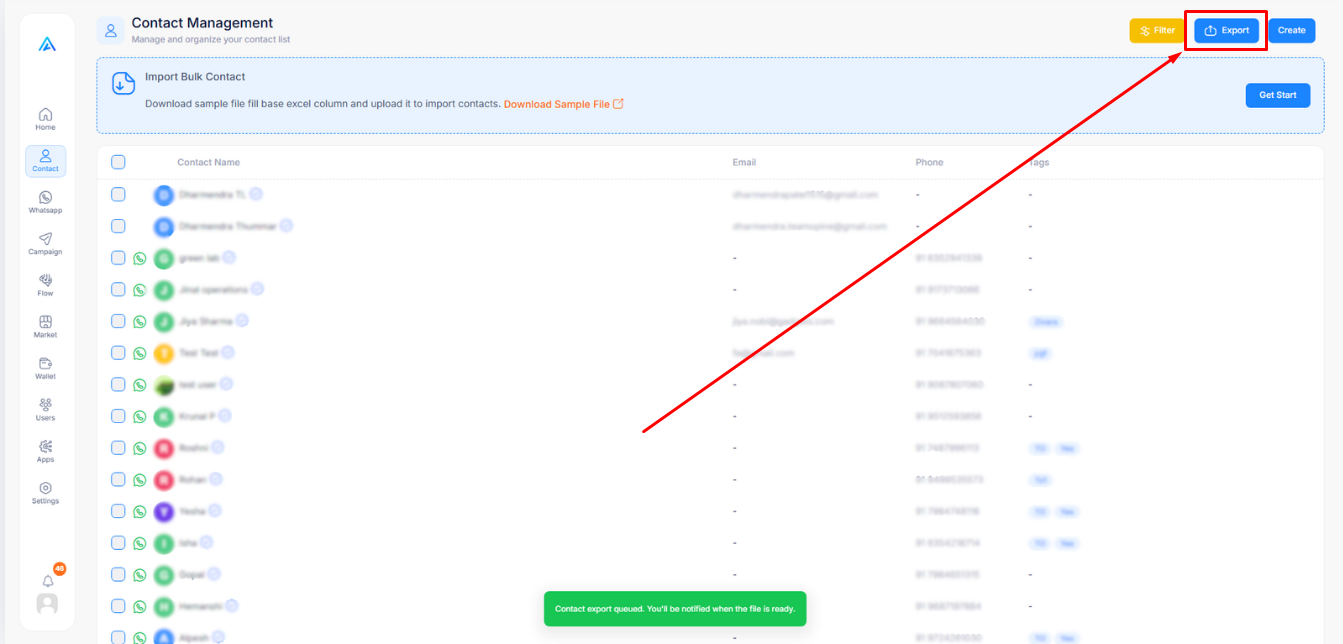
Step 1: Export All Contacts
To download your entire contact list, simply click the Export button located near the top right of the Contacts dashboard. A .csv file will be generated and downloaded to your computer.
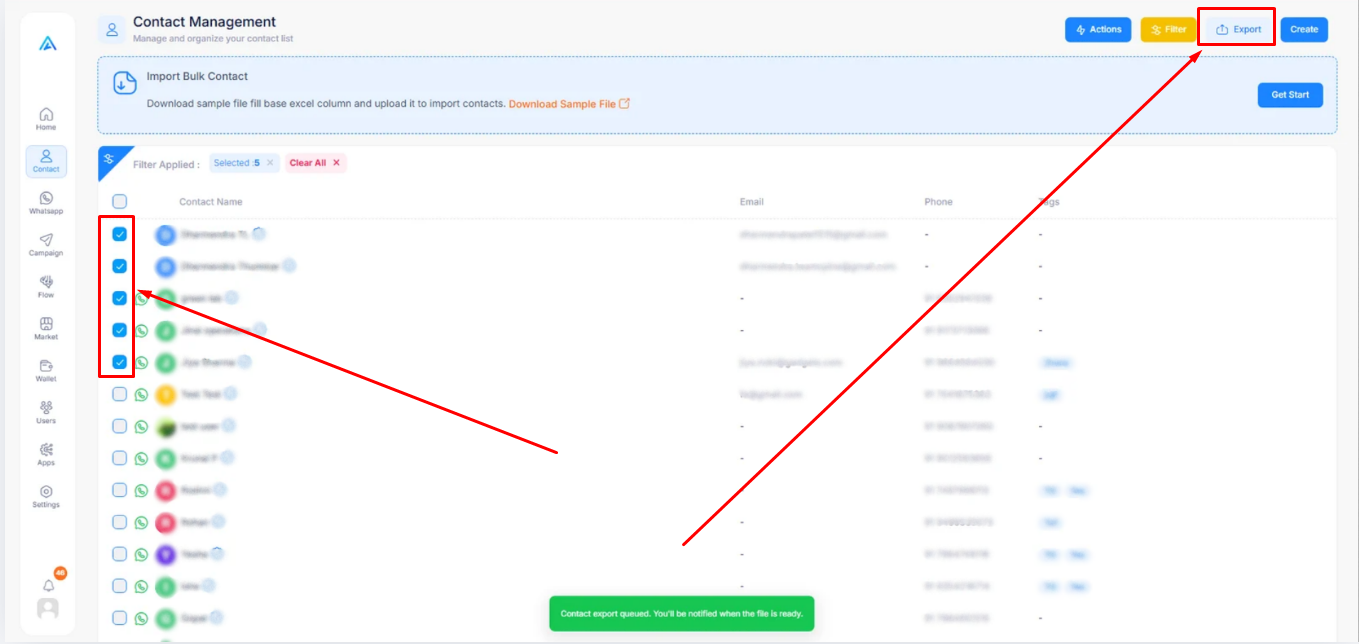
Step 2: Export Selected Contacts
If you only want to export specific people, use the checkboxes on the left side of the table to select them. Once selected, open the Multi Action Contact panel and choose the Export Selected option to download just those contacts.
How to Import Contacts from a File
Migrate your existing audience data directly from Excel or Google Sheets.
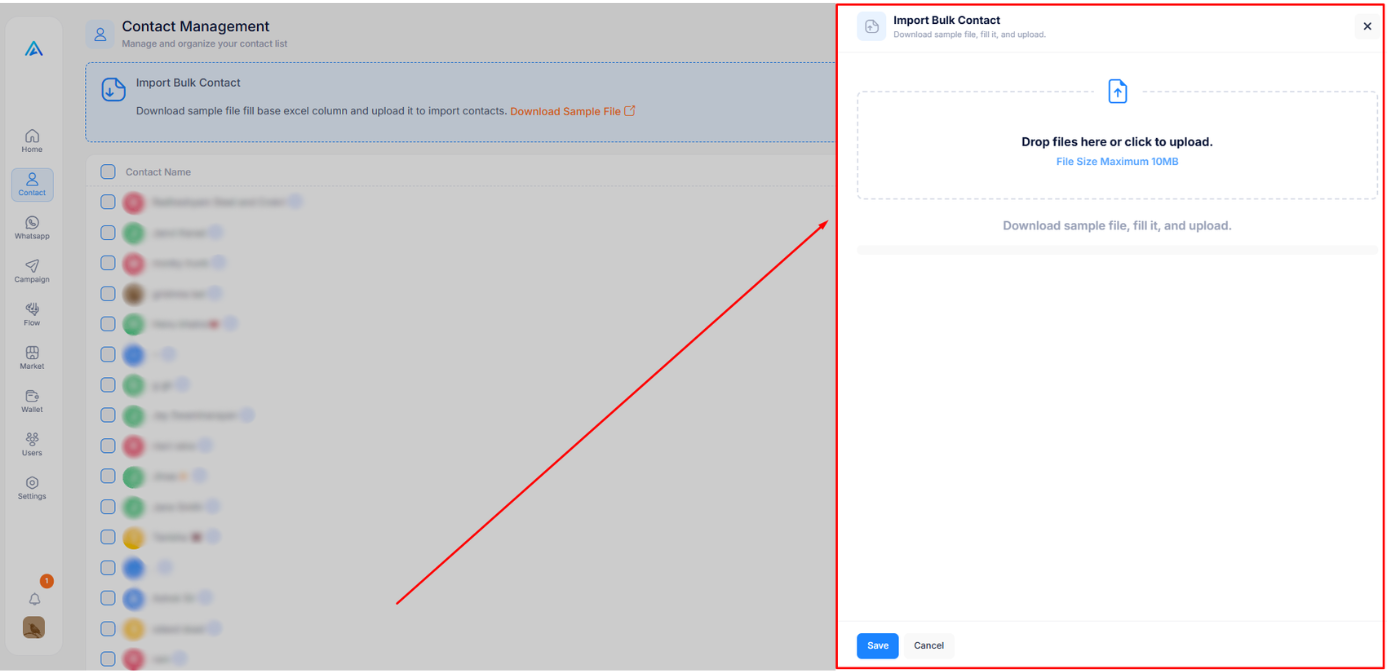
Step 1: Open the Import Window
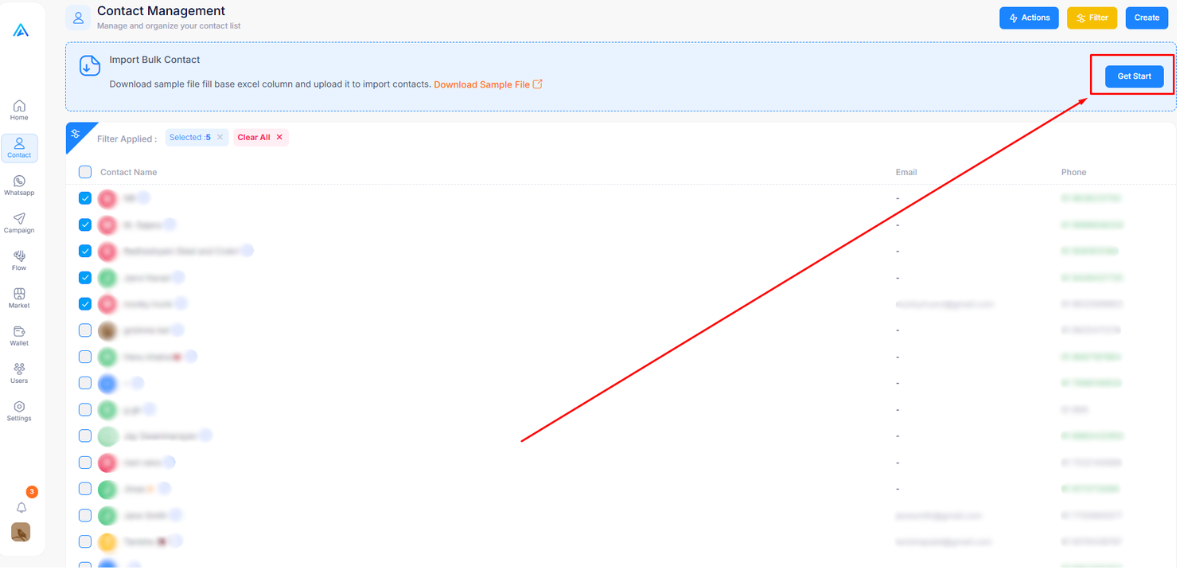
Click the blue Get Start button located in the "Import Bulk Contact" banner at the top of the page.
Step 2: Upload your File
Drag and drop your .xlsx or .csv spreadsheet into the upload box, then click Save. The system will securely import everyone in the background!