Setup Screen
Visual guide to managing custom keys and Shopify merge variables.
How to Access the Setup Screen Interface
Before you can manage your custom attributes, you need to navigate to the Setup Screen Interface dashboard.
Step 1: Log in
Log in to your account to view your main dashboard.
Step 2: Open the Settings Menu
Look at the main menu on the left side of your screen. Find and click the Settings icon (the gear icon) to open the Settings popout menu.
Step 3: Open the Custom Keys Dashboard
Click on Custom Keys from the menu to open the dashboard.
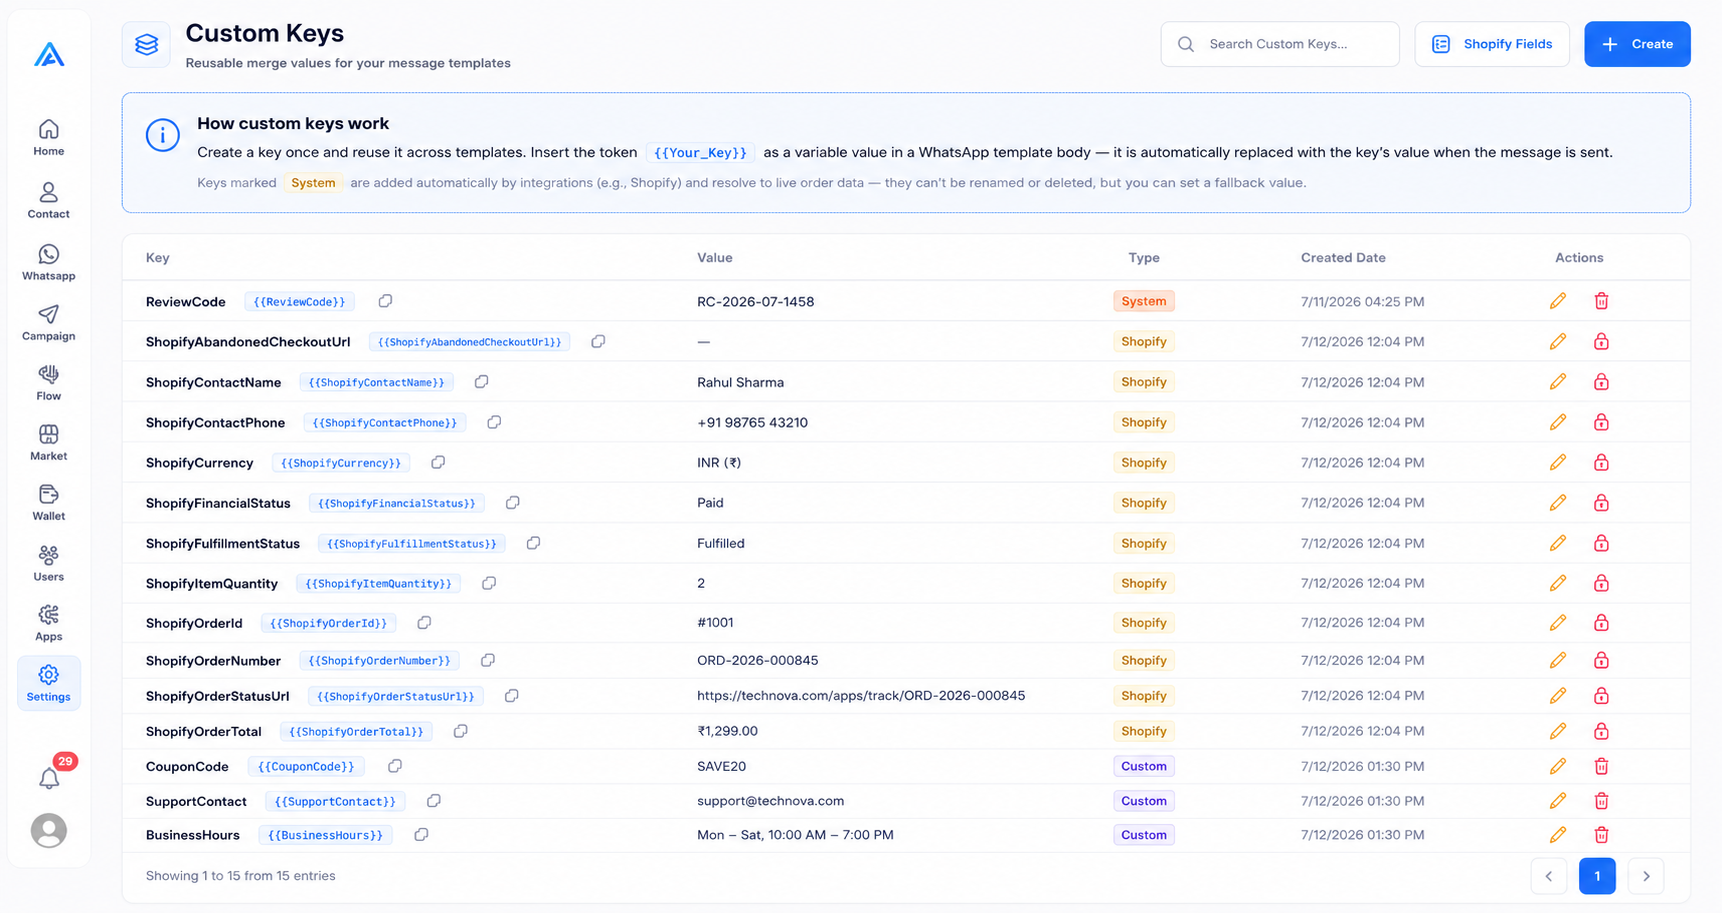
How to Search and View Custom Keys
This screen lists all your custom keys which act as reusable merge values for your message templates. You can search, edit, or delete non-system keys from here.
Step 1: Open the Dashboard
Review the main table which lists your Keys, Values, and their Type (such as custom or Shopify integrations).
Step 2: Search and Manage
Use the "Search Custom Keys..." bar at the top to find a specific key, or use the action buttons on the right to edit or delete your custom keys.
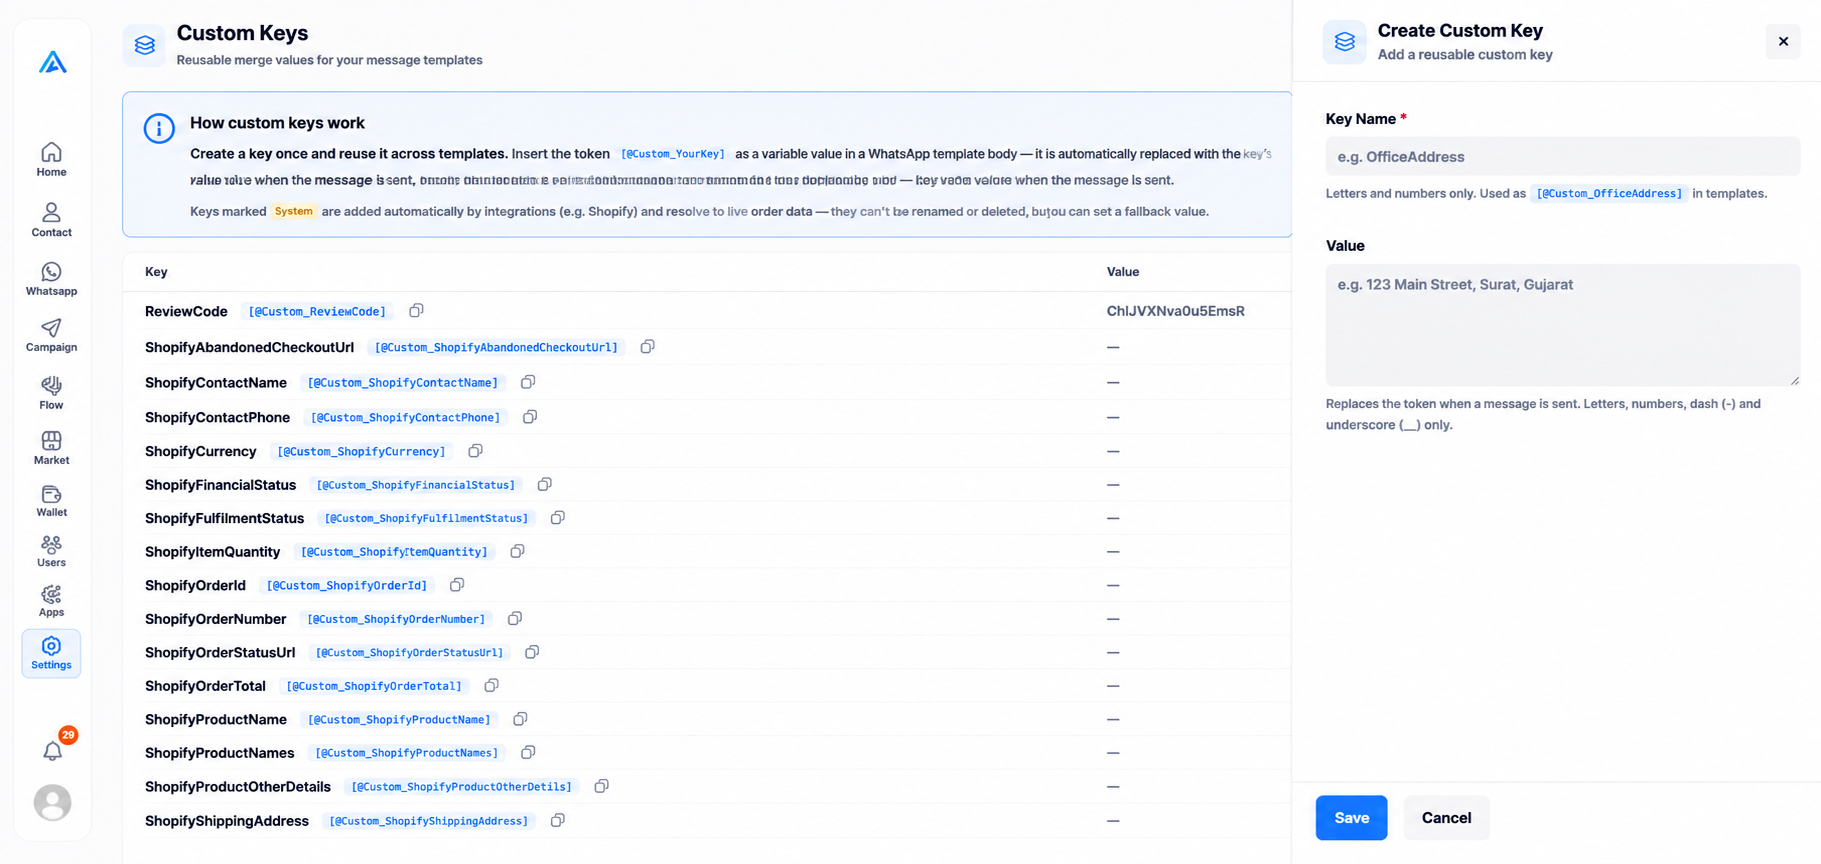
How to Create a Custom Key
When creating a new custom key, provide a Key Name and a Value. Once saved, you can insert the token in your WhatsApp templates to automatically merge this value.
Step 1: Open the Creation Form
Click the blue + Create button located in the top right corner of the dashboard.
Step 2: Fill in Details
Provide a Key Name and its Value. Then click the blue Save button at the bottom of the form.
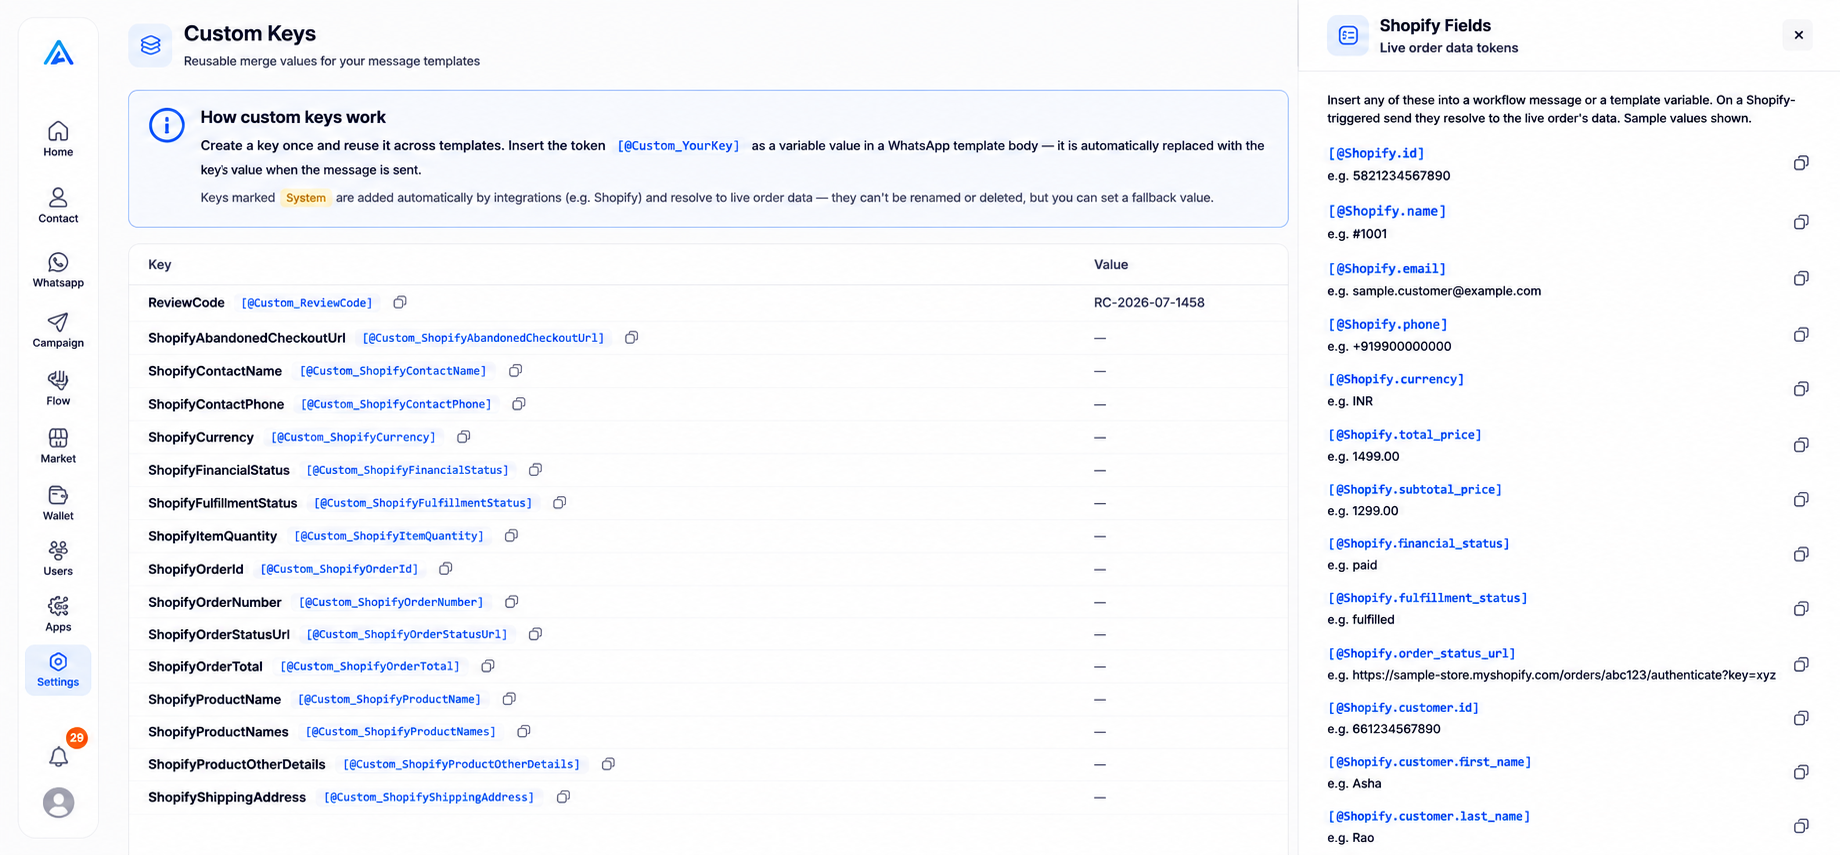
How to View Shopify Fields
Access live order data tokens automatically provided by Shopify integrations.
Step 1: Open Shopify Fields
Click the Shopify Fields button located at the top right corner, next to the Create button.
Step 2: Copy System Tokens
Identify the token you need (like ShopifyOrderNumber) and copy it for direct use in your workflow messages and templates.