Access Control
Visual guide to configuring custom roles and enabling or disabling granular permissions across features.
How to Access the Access Control Interface
Before you can manage team permissions, you need to navigate to the Access Control Interface dashboard.
Step 1: Log in
Log in to your account to view your main dashboard.
Step 2: Open the Roles Dashboard
Look at the main menu on the left side of your screen. Hover over or click the Users icon to open the Users & Roles popout menu, then select Roles.
How to Create a New Role
Create custom roles to assign specific permissions to different types of team members.
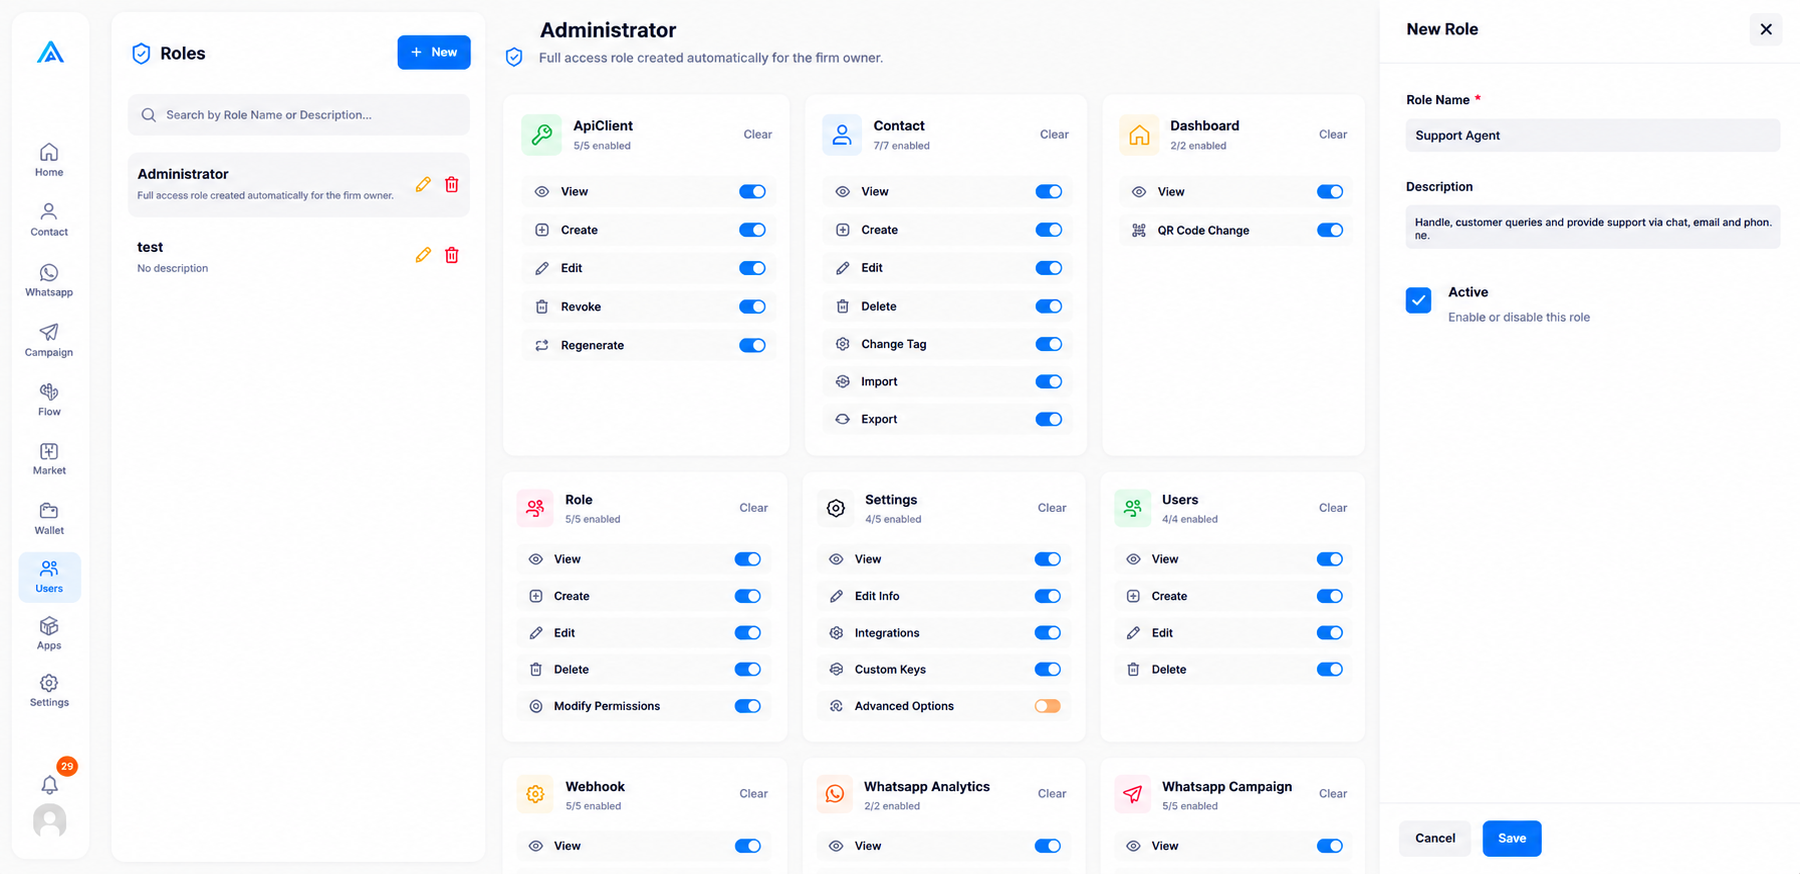
Step 1: Click the + New Button
At the top of the Roles sidebar on the left, click the blue + New button.
Step 2: Enter Role Details
In the side panel that opens, provide a descriptive Role Name and a short Description. You can also toggle the Active status to enable or disable the role immediately.
Step 3: Save the Role
Click the blue Save button at the bottom of the panel to create your new role.
How to Configure Role Permissions
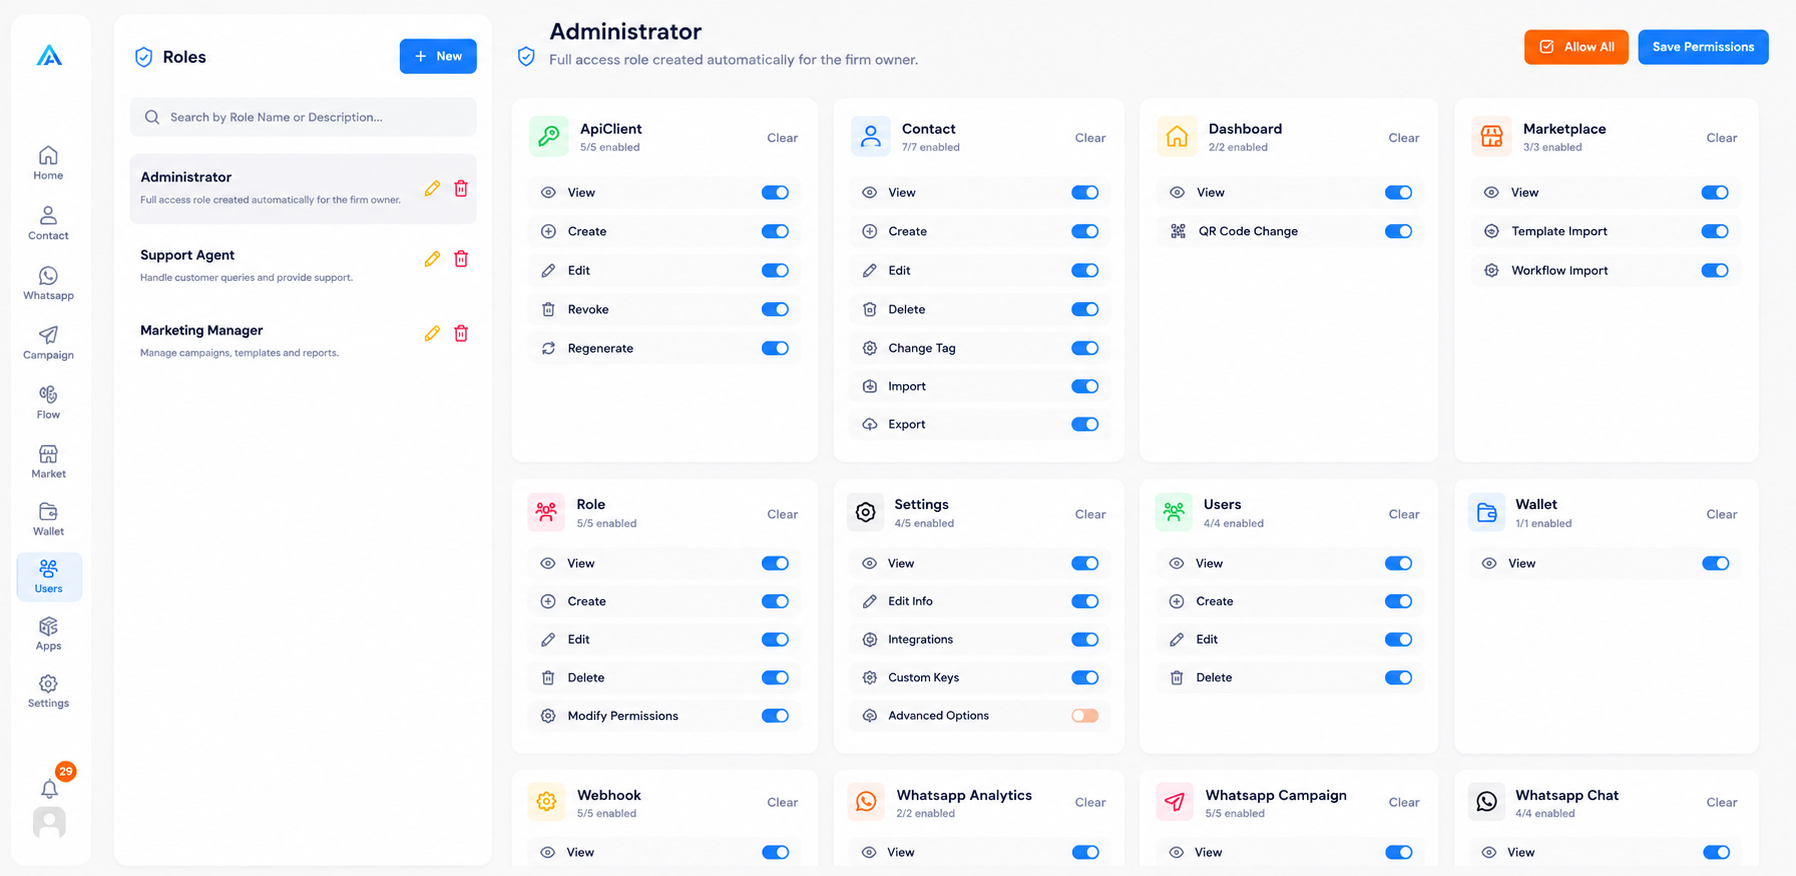
This screen gives you full control over permissions for each feature module (such as Contact, Marketplace, etc.).
Step 1: Select a Module
Scroll through the list of feature modules in the dashboard.
Step 2: Toggle Permissions
For each module, check or uncheck specific actions like View, Create, Edit, and Delete to instantly apply those restrictions.